Named Ranges
Overview
- At this point, you know that cells (e.g. A1) are identified by the cross section of their column letter (e.g. A) and row number (e.g. 1)
- Sometimes, however, you may need to give cells more intuitive names
- This can be done by creating named ranges
- For example, imagine that cell A1 is the cell that contains today's date
- You can actually assign cell A1 the name "Today", if you wanted
- Additionally, you can use named ranges in formulas
- Continuing with the above example, using the formula
=Todaywill return the value in contained in cell A1 - However, even when you name a range, you can still use the normal cell references (e.g. you could still use
=A1instead of=Today)
- Continuing with the above example, using the formula
- Moreover, a named range can be assigned to a single cell (A1), a contiguous range of cells (A1:B10), or a non-contiguous range of cells (A1, B5, and C10)
- When named ranges are referenced in formulas, they work exactly like absolute cell references
Buttons
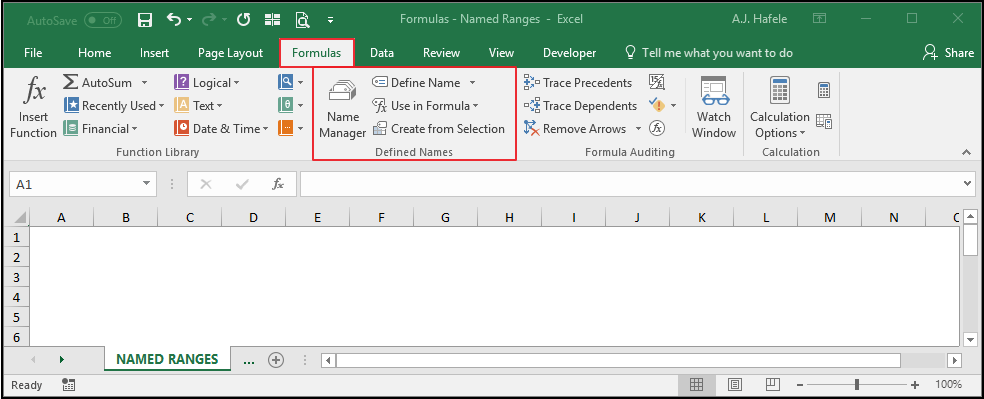
- The relevant buttons can be found in the Defined Names group of the Formulas tab:
- When the Name Manager button (on the Ribbon) is selected, the Name Manager menu appears, as shown here:
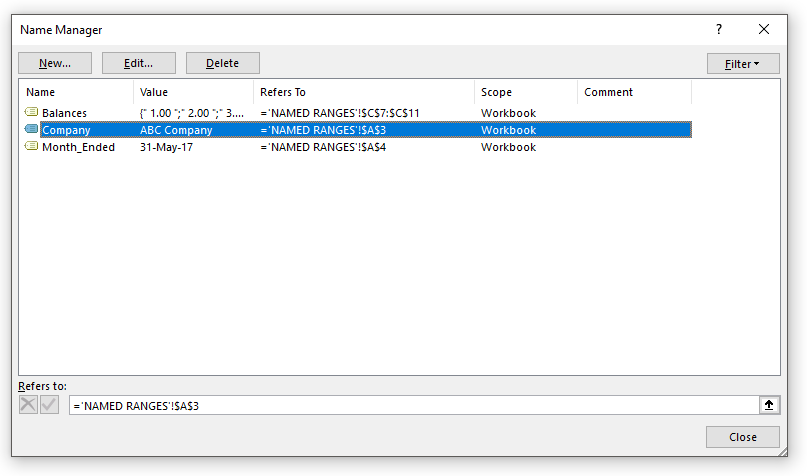
- The Name Manager menu allows you to do a number of things:
- Create new named ranges
- Modify existing named ranges (the name and the applicable range can be modified)
- Delete existing named ranges
- When the Define Name button (on the Ribbon) is selected, or when you select "New..." from the Name Manager, the New Name menu appears, as shown here:
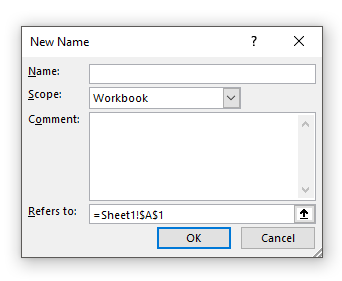
- This is the specific menu used to reference and name a range (as well as to define the scope in which the named range can be used)
- When Create from Selection (on the Ribbon) is selected, the following menu appears:

- Clicking the Use in Formula button (on the Ribbon) will show a drop-down of all named ranges, as shown here:
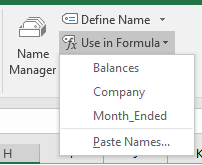
- Selecting one of these (3) names (Balances, Company, or Month_Ended, in this example) will place the named range in a formula (in the active cell)
- We will go over the usage of these buttons and menus below
Create Named Ranges
- There are a few ways to create named ranges
- One way is to select the applicable cell or range of cells, type the name in the Name Box, and press ENTER, as shown here:
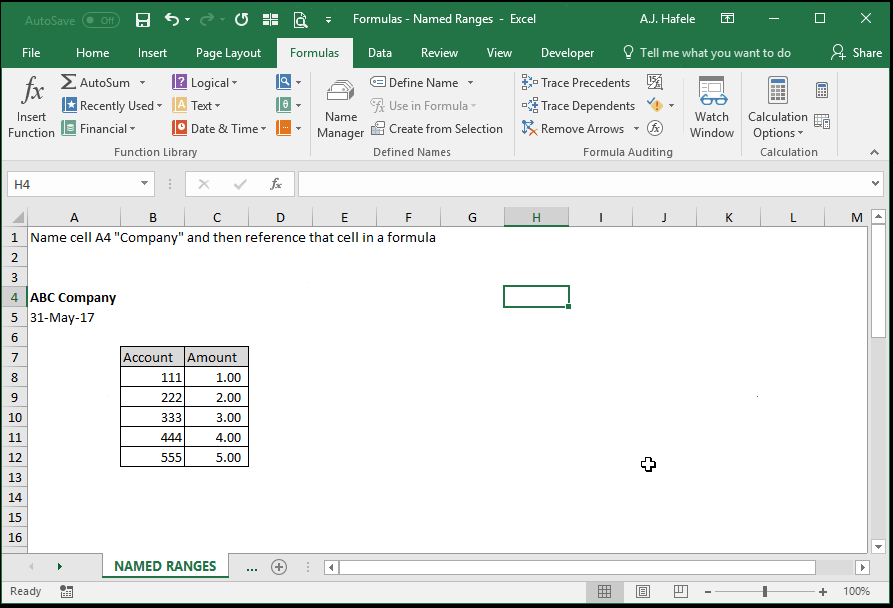
- In the above example, note that:
- You must press ENTER to create the named range after typing it in the Name Box
- We were able to use the formula
=Companyto reference A4
- When referencing named ranges in formulas, an absolute cell reference is effectively created
- Continuing with the above example, observe as we copy and paste the
=Companyformula, as well as=A4and=$A$4:
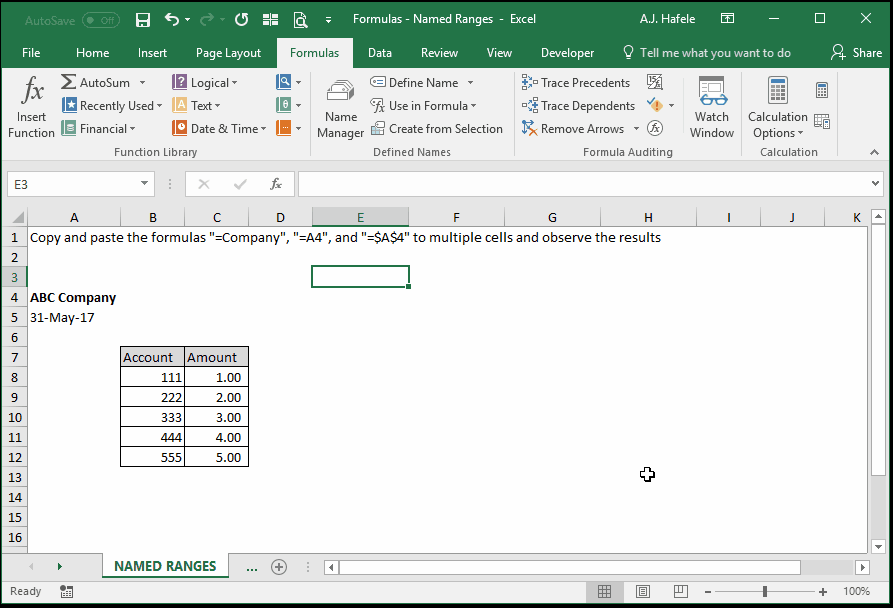
- Note that:
- We used the CTRL+R shortcut to copy and paste the formulas to the right
=Companyworked exactly the same as=$A$4=A4did not work the same, as it is a relative cell reference (the formula bar indicates that the column letter changed upon copying and pasting)
- A second way to create a named range is to use the Define Name button (or shortcut ALT, M, M, D), as shown here:
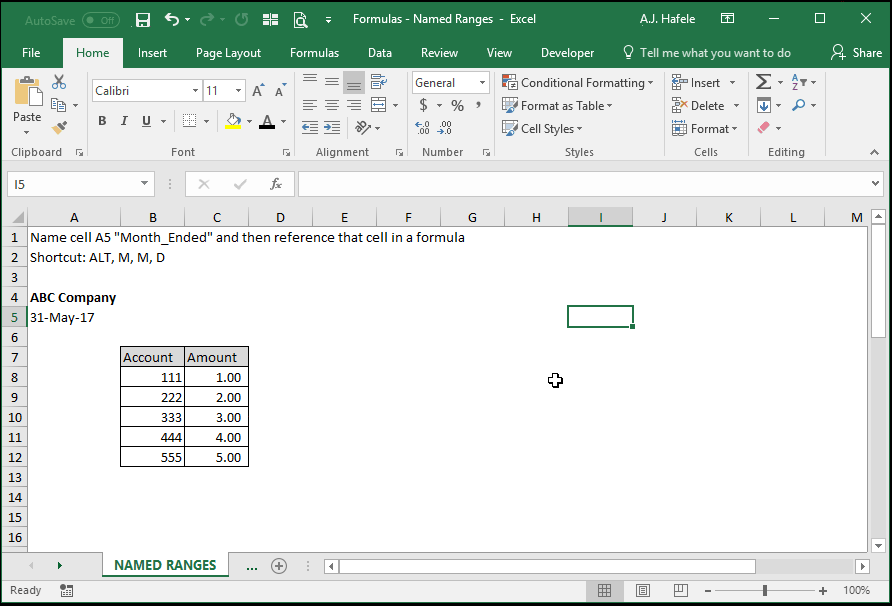
- Notice that:
- Within the New Name menu, we are able to enter the range's name, the scope of the name, a comment, and the range itself
- Upon opening that menu, the default range (the "Refers to:" field) is the selected range (in this case, cell A5) but that can be changed in this menu if desired
- When we referenced cell A5 using its name (Month_Ended), we typed
=month_endedin all lowercase, and Excel still referenced the Month_Ended ranges (in proper case) - This indicates that named ranges are essentially case-insensitive when being referenced
- We formatted the formula result to present the date in a date format (CTRL+SHIFT+3)
- Importantly, within the New Name menu, we did not change the "Scope" of "Workbook"
- But what does option mean?
- The scope refers to where the named range can actually be used
- The scope choices include either 1) the entire workbook, or 2) a single worksheet
- The scope can only be selected when a new named range is being created
- A third way to create a named range is to add a new range in the Name Manager menu (ALT, M, N, ALT+N), as shown here:
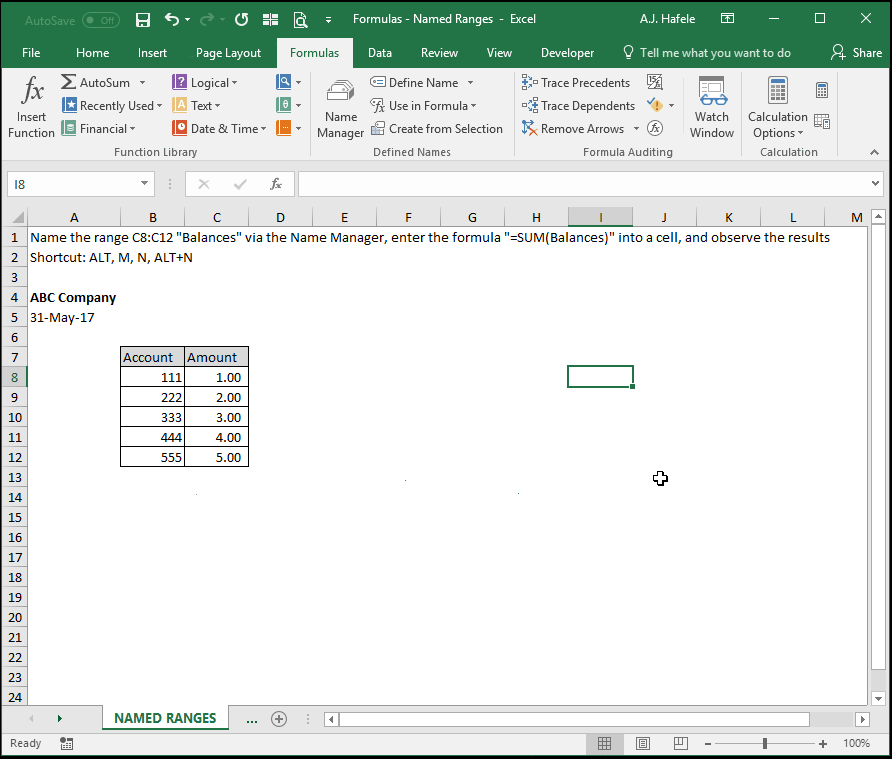
- Notice that:
- The same New Name menu appeared when creating a named range via the Name Manager menu
- When typing the formula, we were able to auto-complete "Balances" by typing "bal" and then TAB
- No quotes are necessary (e.g.
=SUM("Balances")) when referencing a named range
Range Naming Conventions
- Now that you have an idea of what named ranges are, let's review a few conventions for naming your ranges
- A named range cannot contain certain special characters, such as "!"
- A named range cannot be named like a cell, with a letter followed by a number (e.g. A1, BB99, etc.)
- A named range cannot be longer than 255 characters
- A named range cannot contain any spaces
- A named range can contain underscores ("_"), which can be used in place of spaces
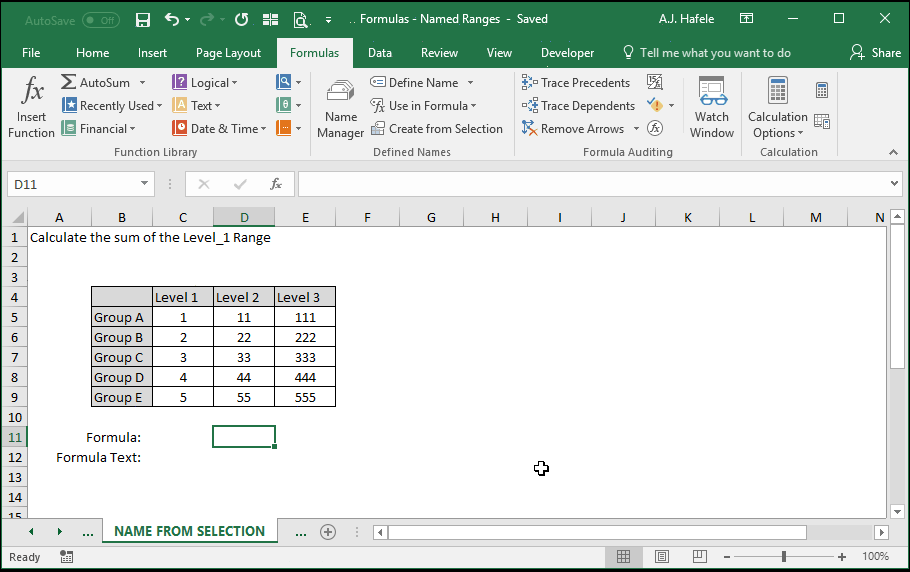
Create Named Ranges from Selection
- If you need to name many ranges quickly (such as from table of data), consider using the Create from Selection functionality, as shown here:
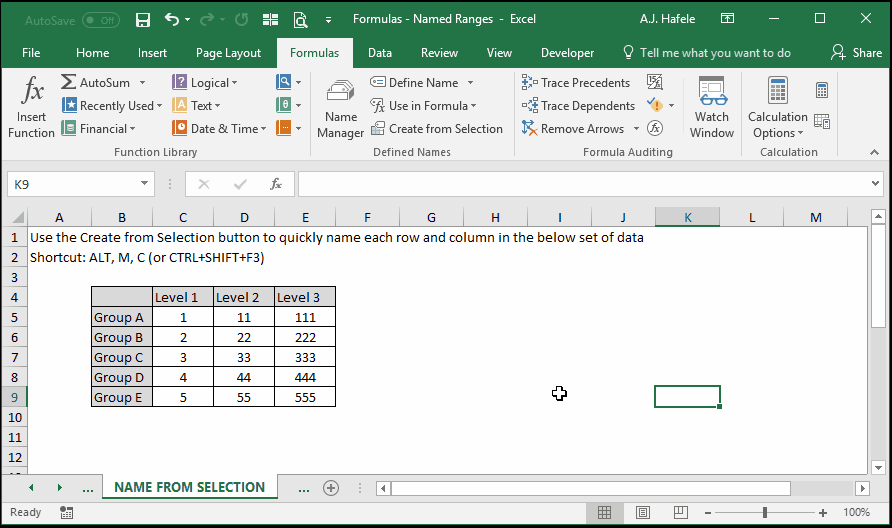
- Notice that:
- By using the Create From Selection button, we were able to quickly name:
- All the rows after the leftmost column (Group A, Group B etc.)
- All the columns after the topmost row (Level_1, Level_2, and Level_3)
- Excel automatically guessed that the top row and leftmost column were row/column headers; this is why the boxes were already checked in the example
- When creating the named ranges, Excel automatically replaced blank spaces with underscores (remember, blank spaces are not allowed in named ranges!)
- By using the Create From Selection button, we were able to quickly name:
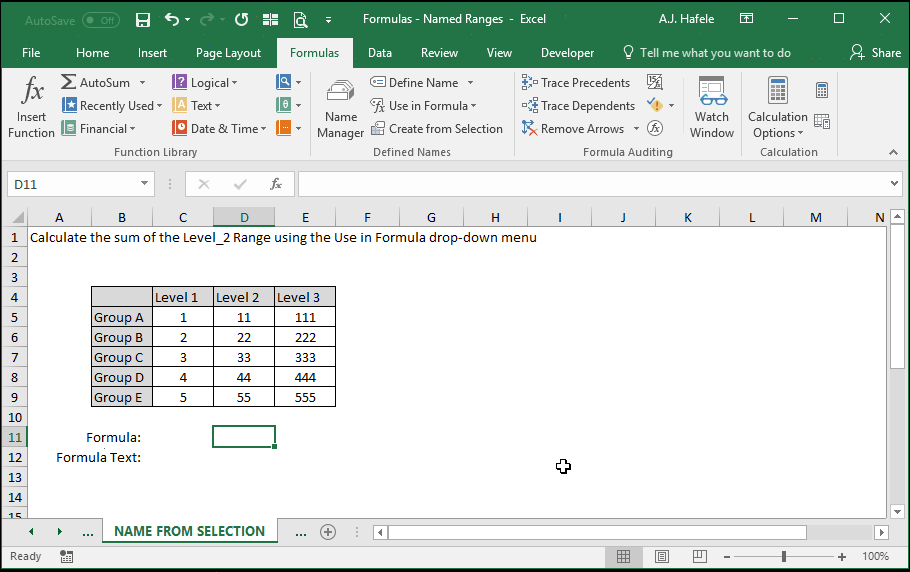
- One cool feature of named ranges is that, when two named ranges intersect, you can reference them in a unique way, as shown here:
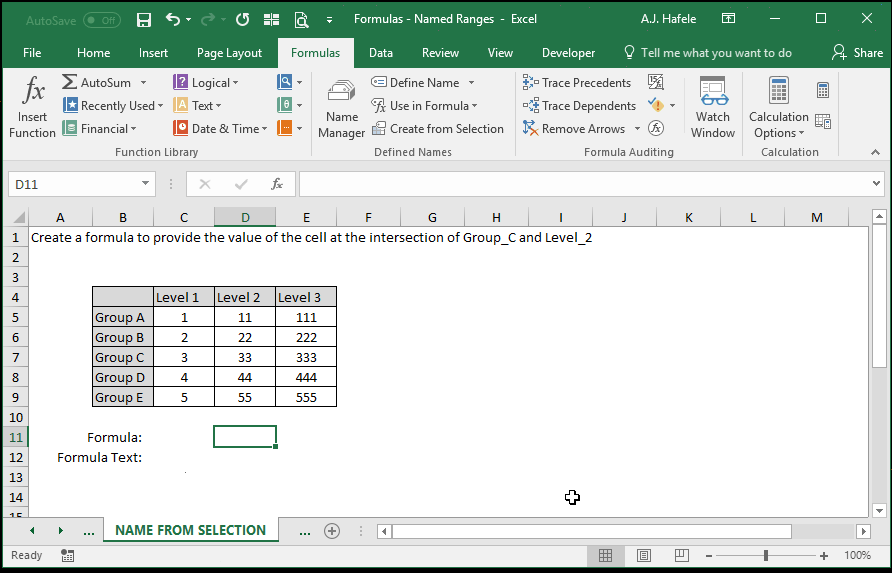
- Notice that we simply created a formula containing three items:
- The named range for the row (Group_C),
- A space (this is required!), and
- The named range for the column (Level_2)
- Note that, if you flipped the references (e.g.
=Level_2 Group_C), you would have obtained the same result
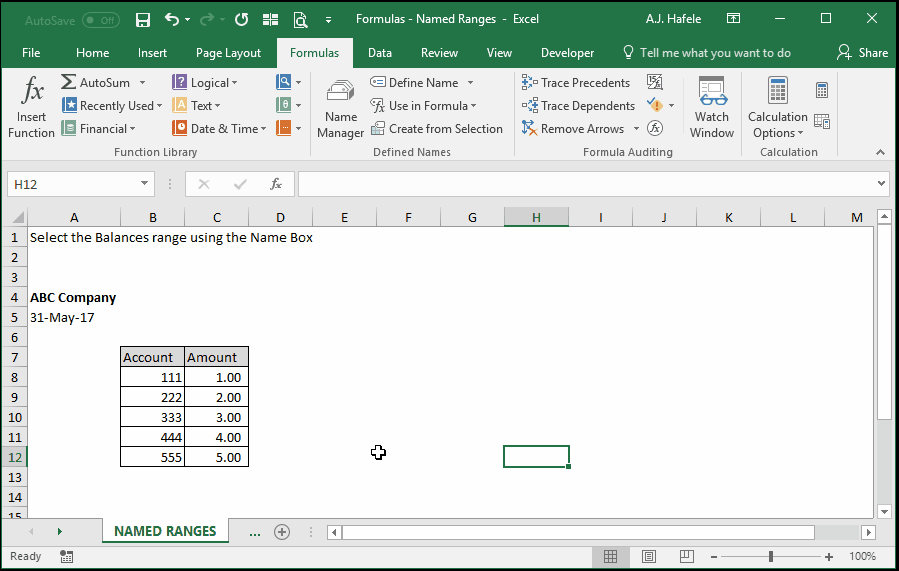
Select Named Ranges
- There are a couple of ways to select named ranges, and you have already seen some in the above examples
- The first way is to use the Name Box, as shown here:
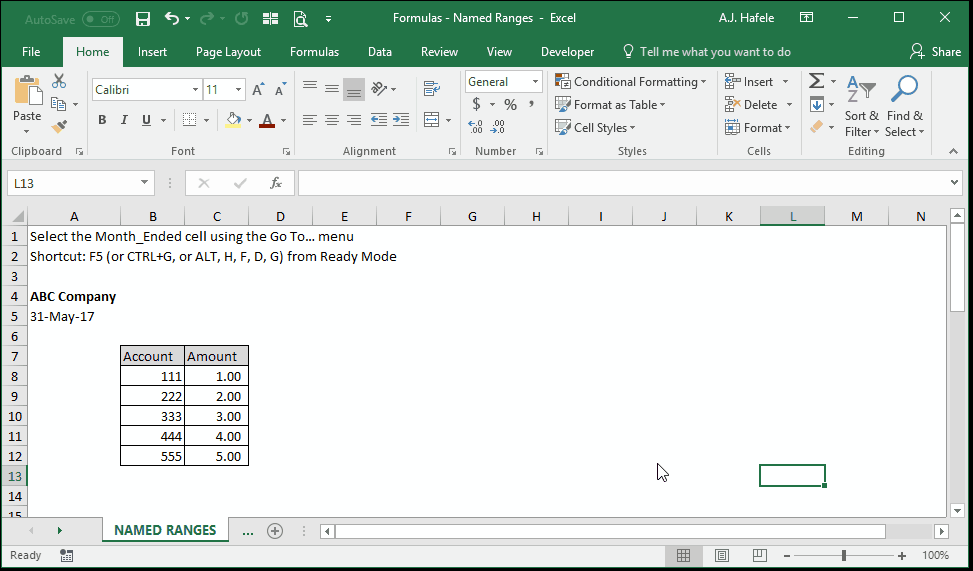
- A second way is to use the Go To...menu by pressing F5 (or CTRL+G, or ALT, H, F, D, G), as shown here:
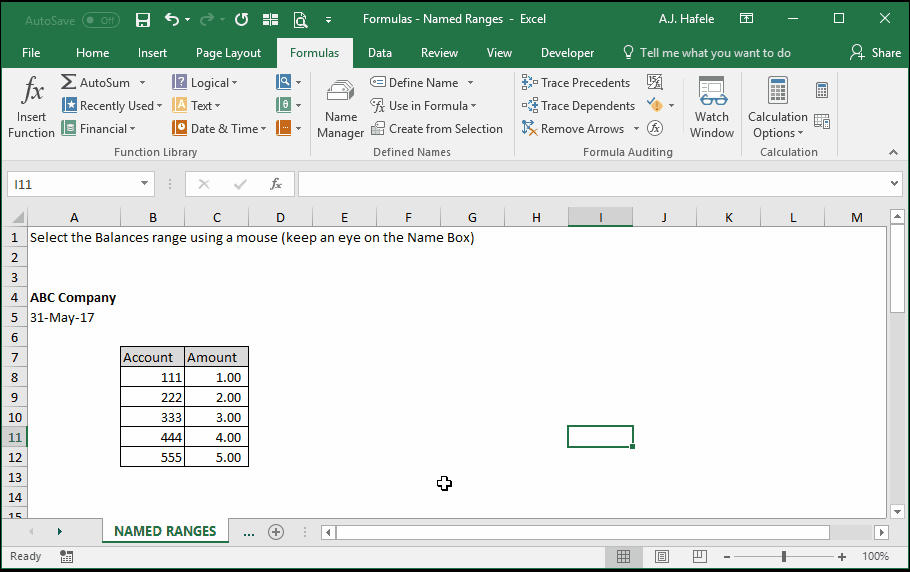
- Of course, you can always simply select a named range with your mouse, as shown here (note the name box updates to "Balances" after selecting all the amounts):
Reference Named Ranges in Formulas
- Let's now quickly review how to reference named ranges in formulas (though, again, you have already seen how this works from previous illustrations)
- One easy way to reference a named range is to simply type it within a formula, as shown here:
- A second way to reference a named range in a formula is to use the Use in Formula button in the Ribbon, as shown here:
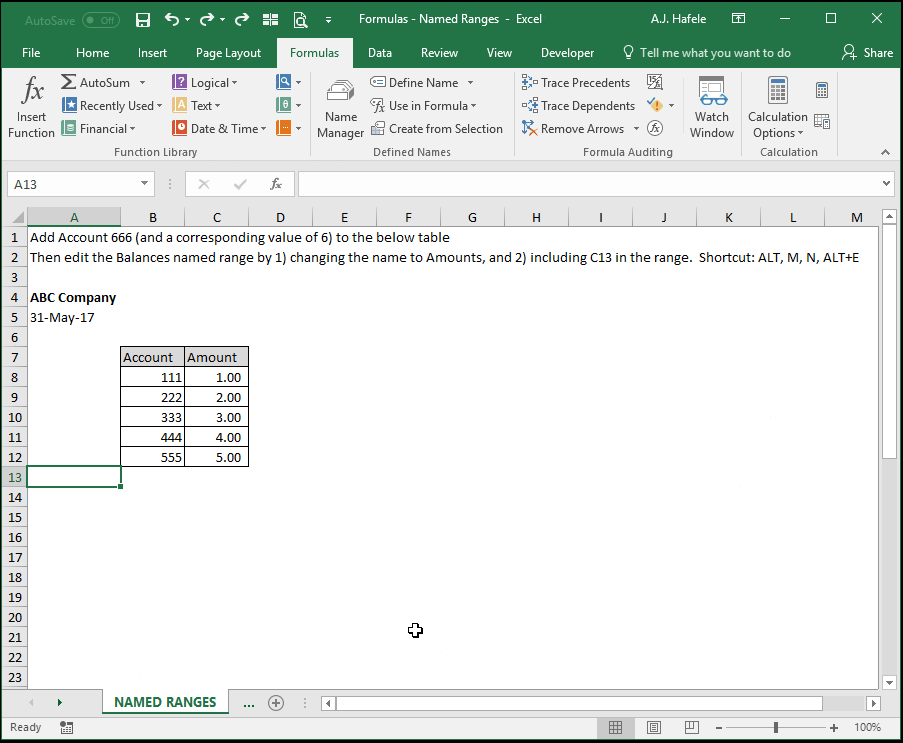
Edit Named Ranges
- After a range is named, it can still be modified. This is true for:
- The range's name
- The range itself
- The following illustrates how to edit an existing named range using the Name Manager menu (shortcut ALT, M, N):
Delete Named Ranges
- If you decide that you no longer need a named range, you can simply delete it
- Named ranges can be deleted via the Name Manager menu, as shown here:
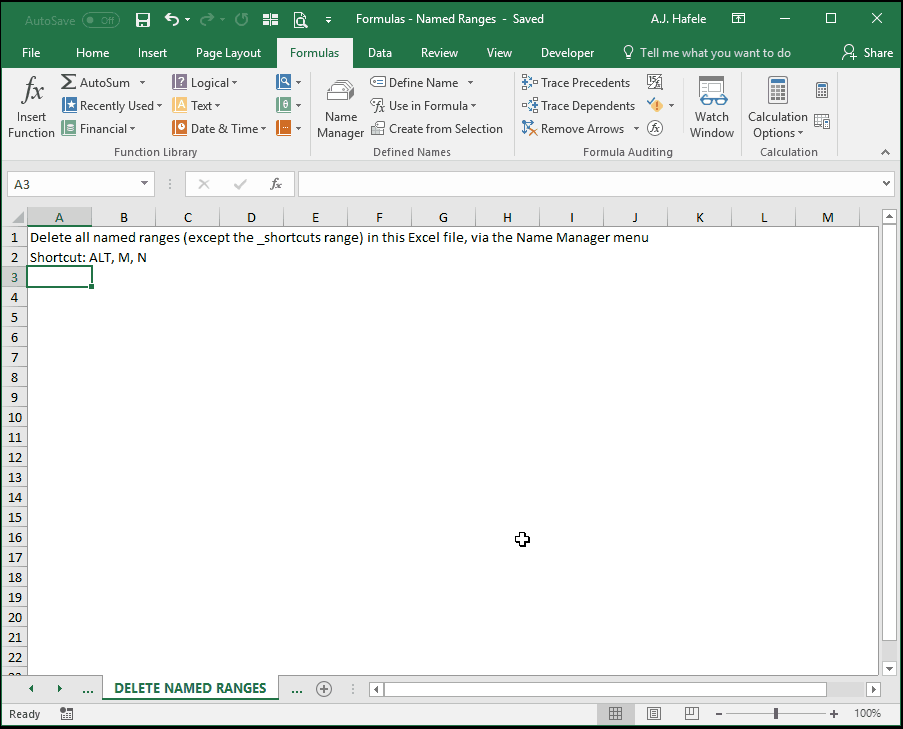
- In the above example, note that we held SHIFT and left-clicked Month_Ended to select and delete multiple named ranges
Tips
- Named ranges are very useful when you need to reference an input in many different places in a workbook
- If certain cells require the use of data validation lists, try referencing a named range in the Settings tab of the Data Validation menu (as the Source), rather than the cell references themselves (e.g.
=$A$1:$A$10). But why?- When you 1) use normal cell references (e.g.
=$A$1:$A$10) to create a data validation list, and 2) the cell containing the data validation rule is not on the same worksheet, the data validation list will not dynamically update when a new list item is added (e.g. a value is entered into cell A11) - When using a named range, however, the list will dynamically update in this situation
- When you 1) use normal cell references (e.g.
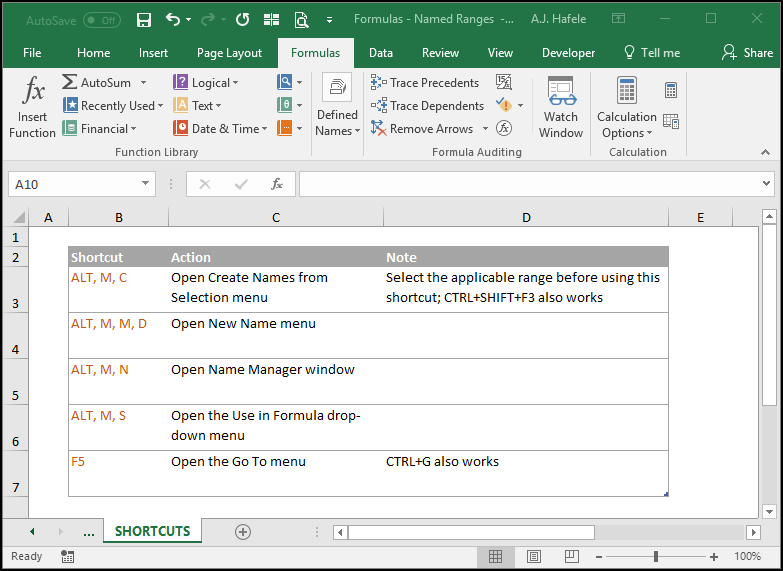
Shortcuts