The easiest way to insert a function into a cell is to simply type the function name directly into a formula
However, what if you do not know the function name?
Or what if you need some clarification regarding how the function works?
The solution is to:
Use Insert Function button to search for a function, and/or
Select a function from the Function Library group of the Formulas tab
In this lecture, you will be exposed to functions that have not been discussed up to this point. However, note that the emphasis is not on the functions themselves, but rather the various methods used to search and build functions via the menus described in this lecture
Buttons
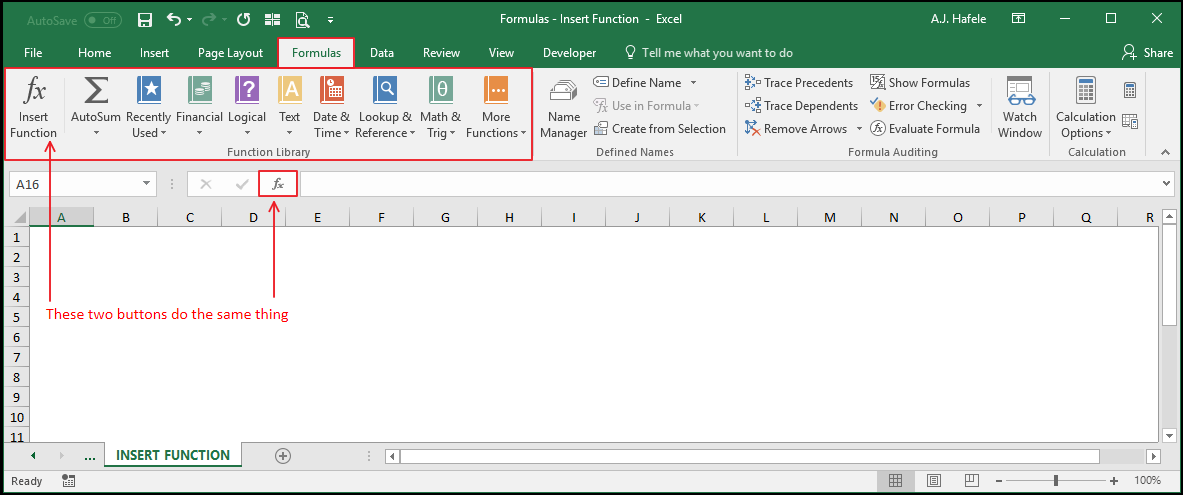
The relevant buttons can be found in the Function Library group of the Formulas tab, and directly to the left of the formula bar:
When one of the two Insert Function buttons (being pointed to in the above screenshot) are selected, the Insert Function menu will appear:
This menu helps you search for the function you need
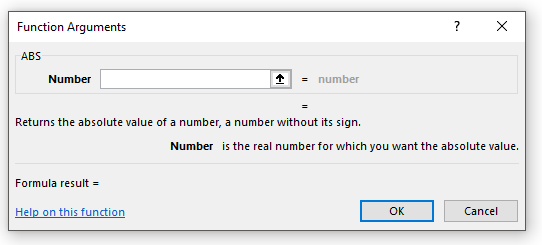
Upon selecting a function from either 1) the Insert Function menu, or 2) one of the other buttons boxed in red in the first screenshot above, the Function Arguments menu appears:
Note that this menu is unique to each function
In the above screenshot, you are viewing the Function Arguments menu for the ABS function
We will provide illustrations below which will show you how to use the buttons and menus described above
Insert a Function
To reiterate, you can use the Insert Function button to search for and build a function within a cell
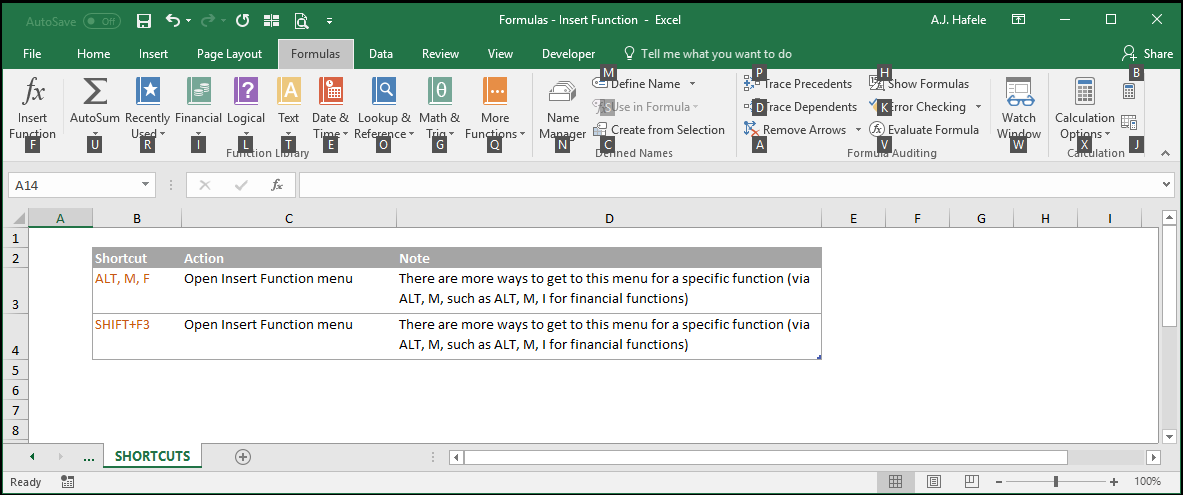
Observe as we use the Insert Function button (ALT, M, F) to insert an IF function:
Notice that:
Upon clicking the Insert Function button, an = symbol was automatically placed in the orange cell, and the Function Arguments menu appeared
Within the Function Arguments window, we were able to search for the IF function
After selecting the IF function from the Insert Function menu, the Function Arguments menu for the IF function appeared
The Function Arguments menu was used to enter the arguments (using TAB to go from one argument to the next) and ultimately store the formula in the cell after clicking "OK"
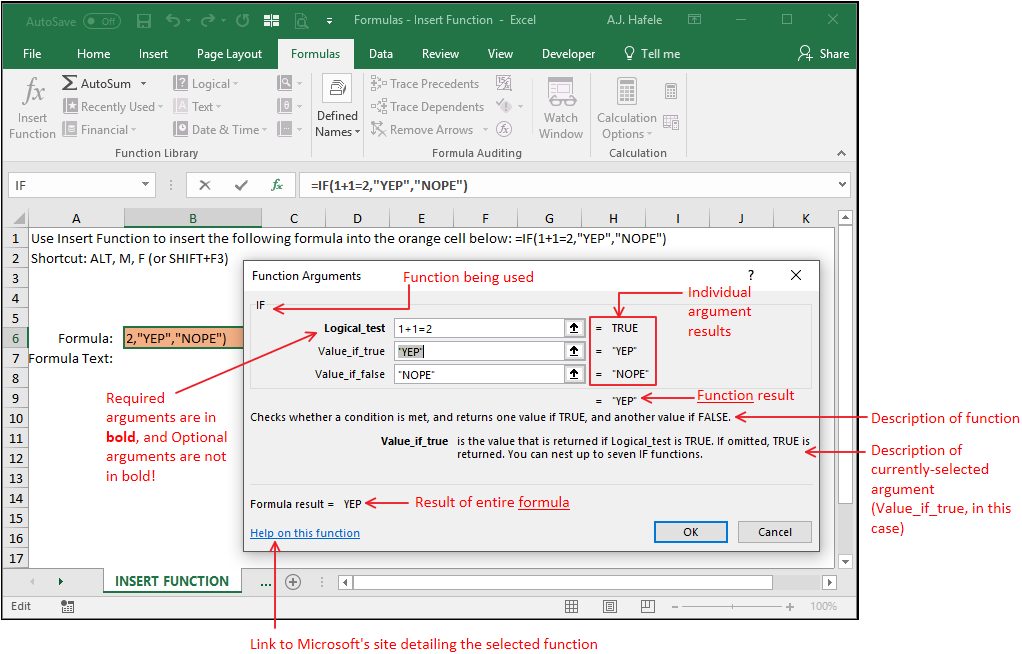
As you can see, the Function Arguments window provides a lot of useful information pertaining to the function you are building
For reference, here is a screenshot of the Function Arguments menu from the previous example:
This menu can be a valuable resource/guide if you run into problems creating functions
Moving on, if you know a function's name, but you still need to bring up the Function Arguments menu (e.g for clarification on an argument), perform the following steps:
Type in the function, including the first open parenthesis,
Click the Insert Function button, and
Continue building the function from that menu (as we did above), if desired
Observe the following example:
As you can see from the illustration, we were able to continue writing the rest of the function after left-clicking the Insert Function button
The Function Library
The Function Library group of the Formulas tab is convenient in that it:
Organizes the various functions logically, and
Is easy to navigate (since you can select functions directly from the Ribbon)
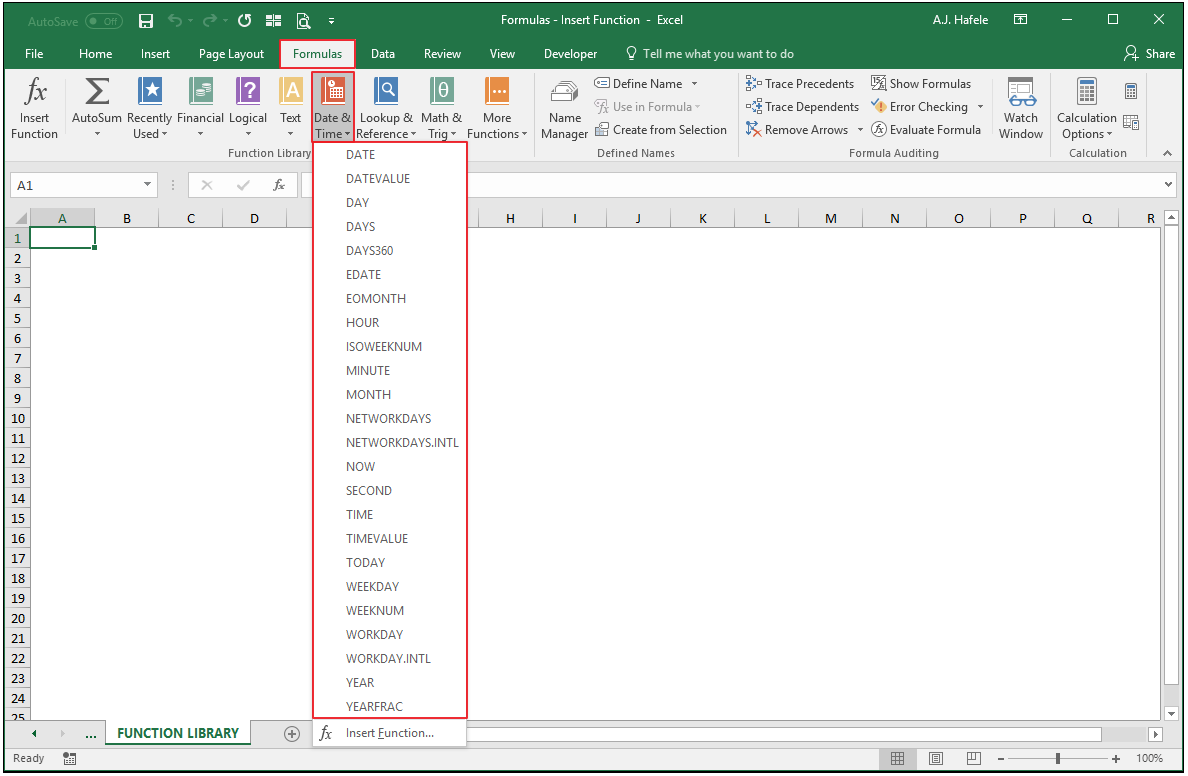
For example, the following screenshot shows the various date and time functions available upon clicking the Date & Time button:
Upon selecting a function from one of these drop-down menus, you are taken directly to the Function Arguments menu for that function
Observe as we select the EOMONTH function from the Date & Time button in the Function Library group (we will not enter any arguments at this point, however):