Cell borders are simply lines that can be added around cells, which can aid in visualizing your data
Cell borders are not the same as gridlines (which are typically visible by default), the latter of which help you view and identify individual cells (and their rows and columns)
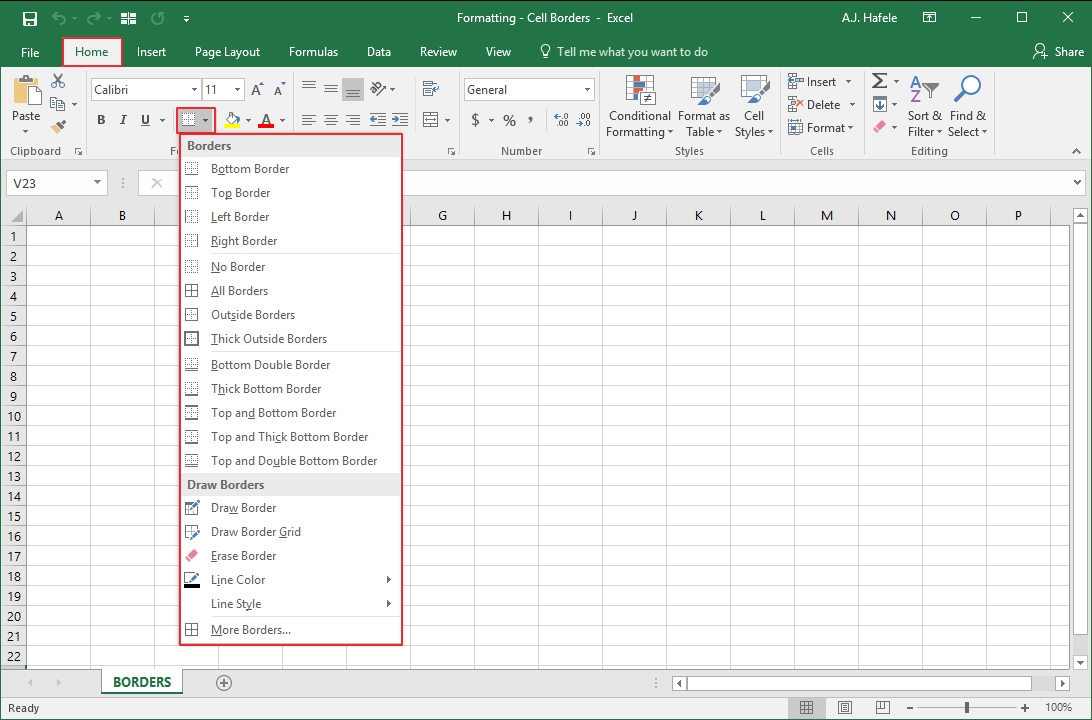
Buttons
The relevant buttons can be found in the Font group of the Home tab:
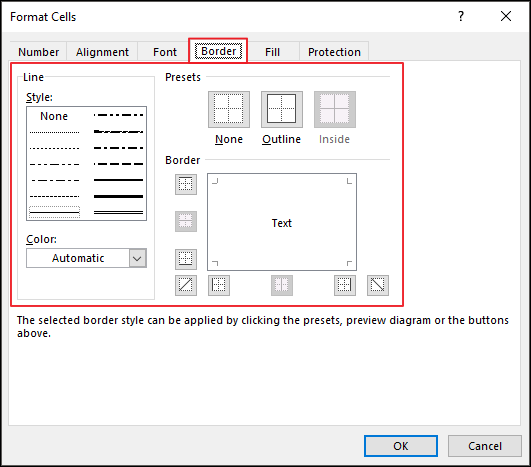
Cell borders can also be modified (with more options, including border colors) in the Format Cells menu (CTRL+1):
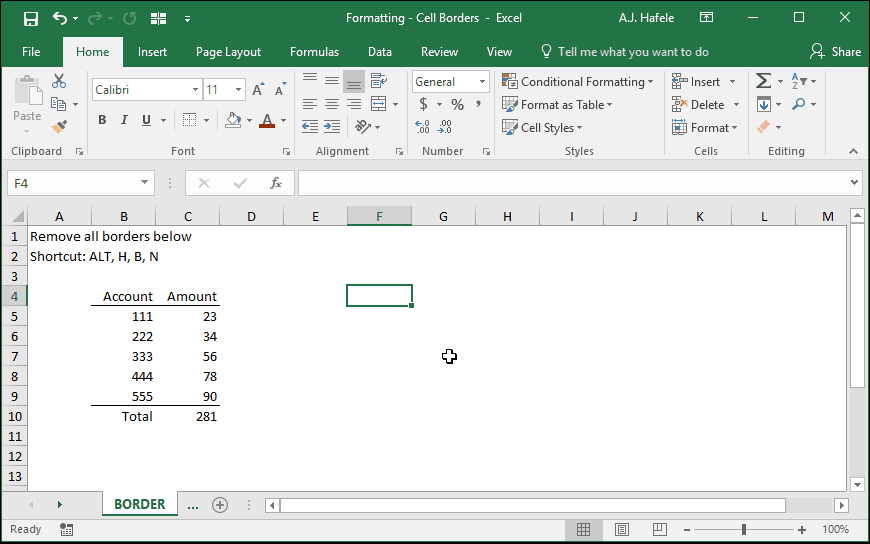
Add and Remove Borders
Observe as we add bottom (ALT, H, B, O) and top borders (ALT, H, B, P) to some data:
Now, let's quickly remove the borders that were created:
Though not shown above, you can add or remove borders from non-contiguous ranges of cells
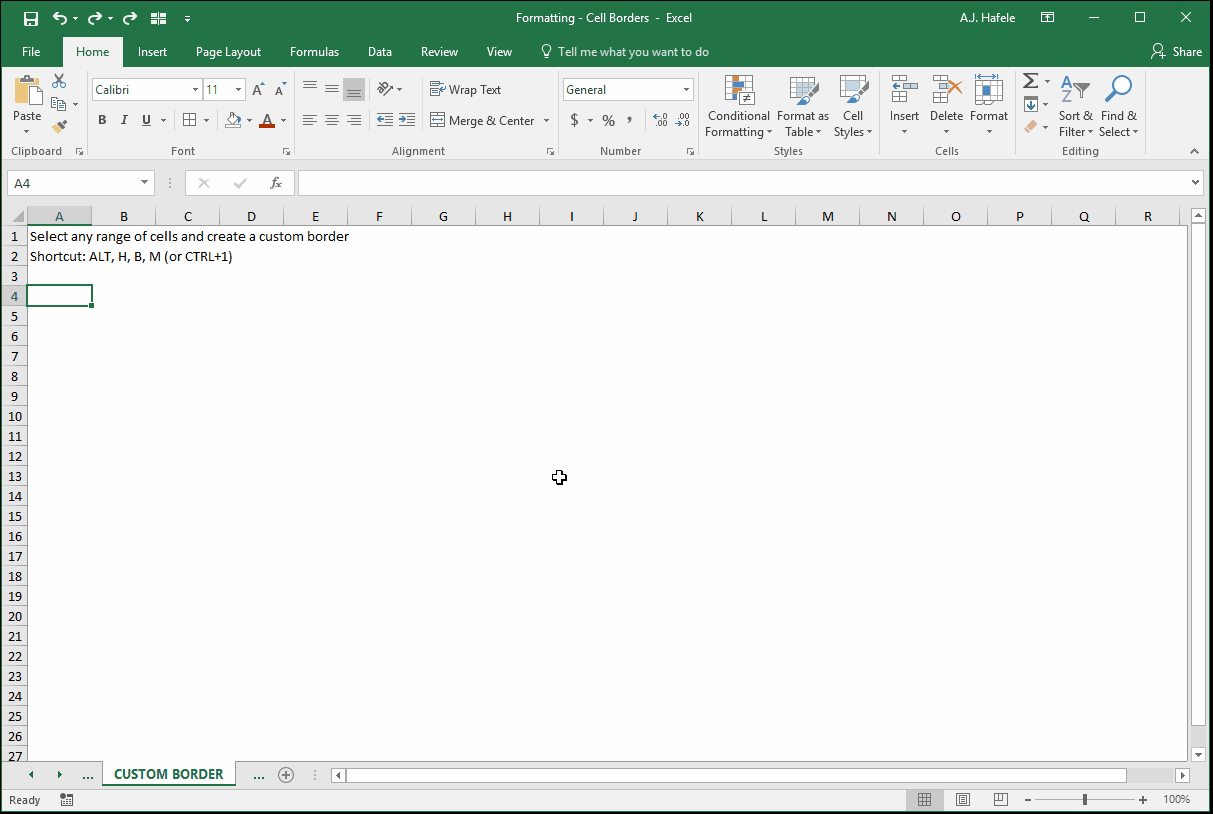
Custom Borders
Observe as we create a custom border (that is very ugly!) via the Format Cells menu (CTRL+1, or ALT, H, B, M):
As you can see in the above example, there are many border options to choose from, even "borders" that cross through cells!
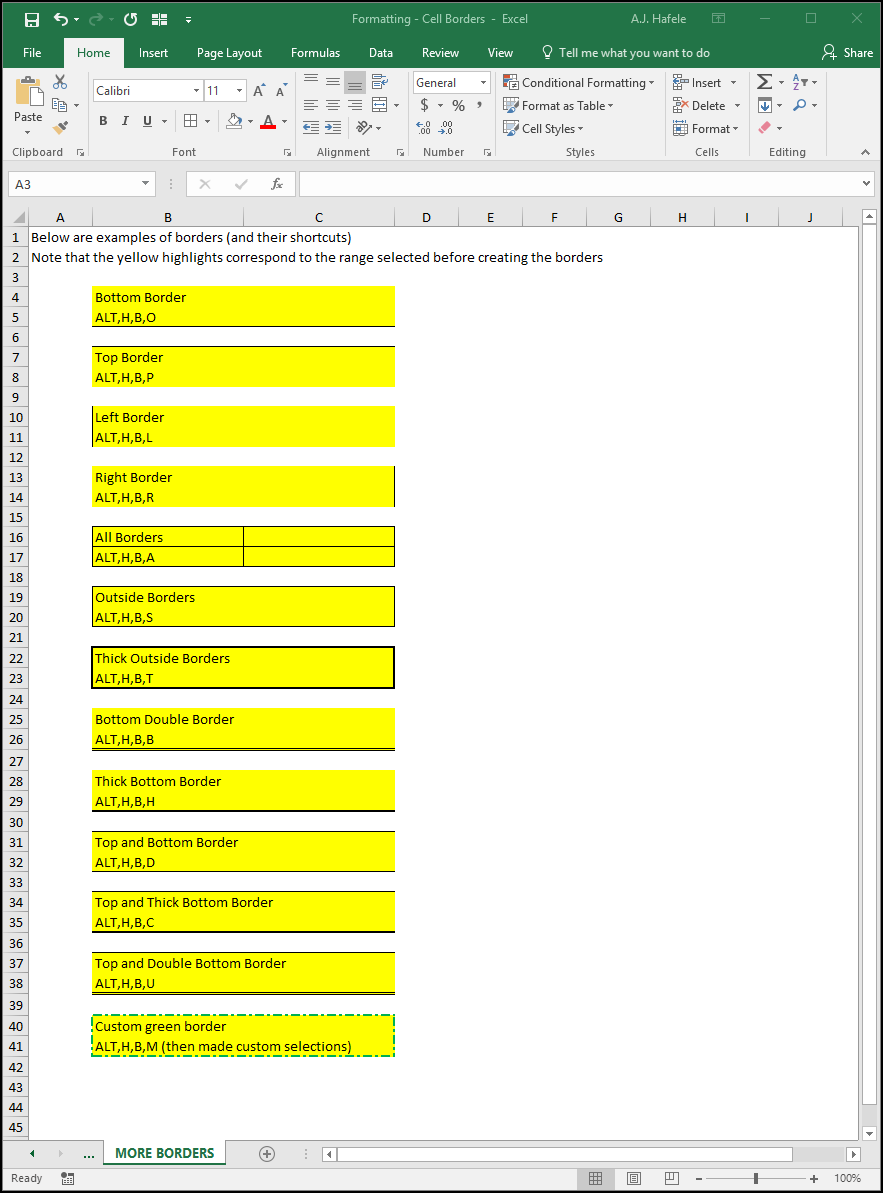
More Border Types
The following screenshot shows a variety of different borders that can be created:
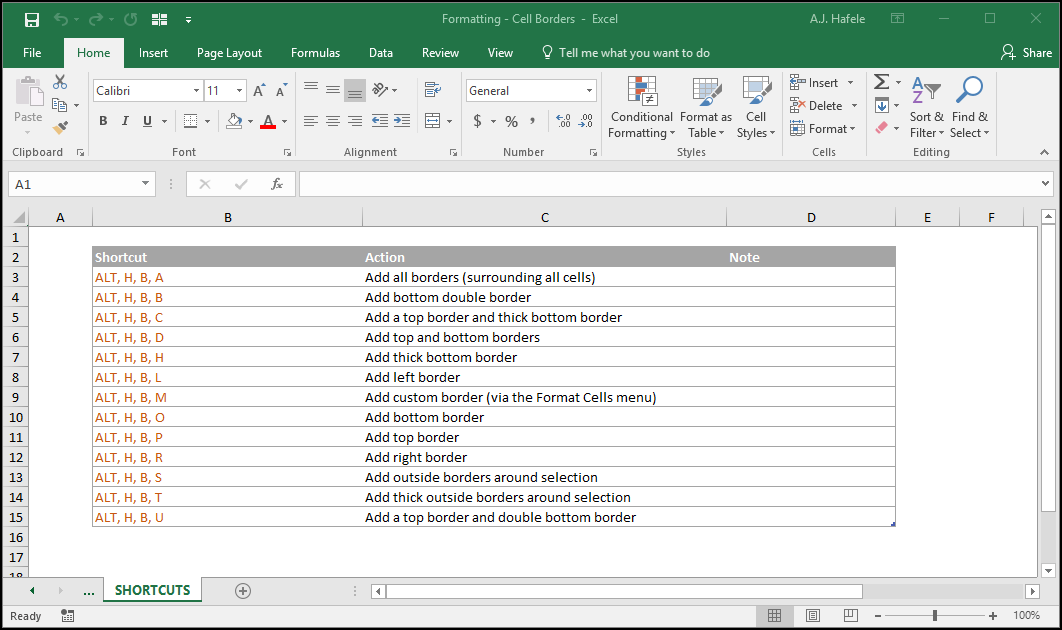
Be sure to familiarize yourself with some of the more commonly-used shortcuts (e.g. ALT, H, B, O for a bottom border)
Last, note that we did not go through all of the border options available via the Ribbon, so be sure to explore further yourself!
Tips
Use cell borders only where necessary, such as on a totals row, or around a small table
When creating files, add borders at the very end of the process, or else you will likely be deleting and re-adding borders during the editing process
Recognize that more borders will increase your file size
Keep it simple! Typically, it is not necessary to create fancy borders
Additionally, borders are almost completely unnecessary if your data are contained in tables (discussed later)