This lecture serves as an introduction to the VBA (Visual Basic for Applications) programming language
VBA is so extensive that an entire course could be dedicated to it, hence the reason this is merely an introductory course!
This course covers the following topics:
Basic information about VBA
Where and how to enter VBA code (including using the Macro Recorder)
The two major categories of VBA code: Sub procedures and Function procedures
When you should use VBA
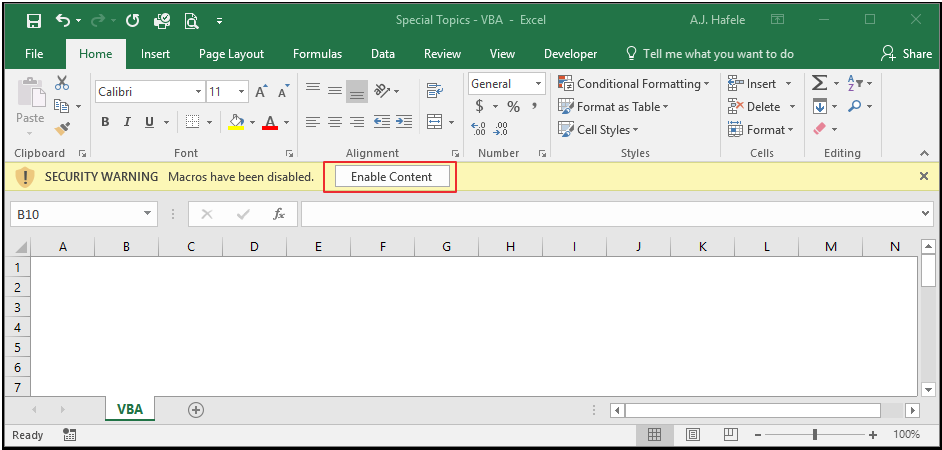
Using This Lecture's File
Before we proceed, if you plan to use this lecture's Excel file with the below discussion, please ensure you enable macros by clicking the "Enable" button here:
What is VBA?
VBA, or Visual Basic for Applications, is a programming language that allows you to customize Excel via macros
Macros are sets of code that are performed in an automated fashion (you create the code first, and later you execute the code to perform some type of action)
VBA is an object-oriented language, which means that it allows you to specify objects (e.g. specific cells, worksheets, workbooks, charts, PivotTables etc.) and then manipulate those objects in certain ways
There is a structured hierarchy of objects which allows you to drill down to the specific object you need to manipulate
For example, to select cell A1 in Sheet1 of Book1.xlsm in Excel, you would use the following code:
Each term above is an object (except the last one - Select - which is an action, referred to as a method)
There are two broad categories of macros you can create in Excel (discussed more below):
Function procedures: to create custom functions
Sub procedures: to perform a wide variety of tasks
Note that VBA is used with other Microsoft Office applications, but we focus on VBA's usage with Excel here
Why Use VBA?
VBA can be valuable when the built-in functionalities of Excel are insufficient (or inefficient) in getting your tasks completed
Among other things, VBA allows you to:
Automate repetitive tasks (imagine having to perform the exact same 20 tasks to re-format raw data in 100 Excel files)
Create custom functions (imagine having to re-create a big, ugly, complicated formula over and over again)
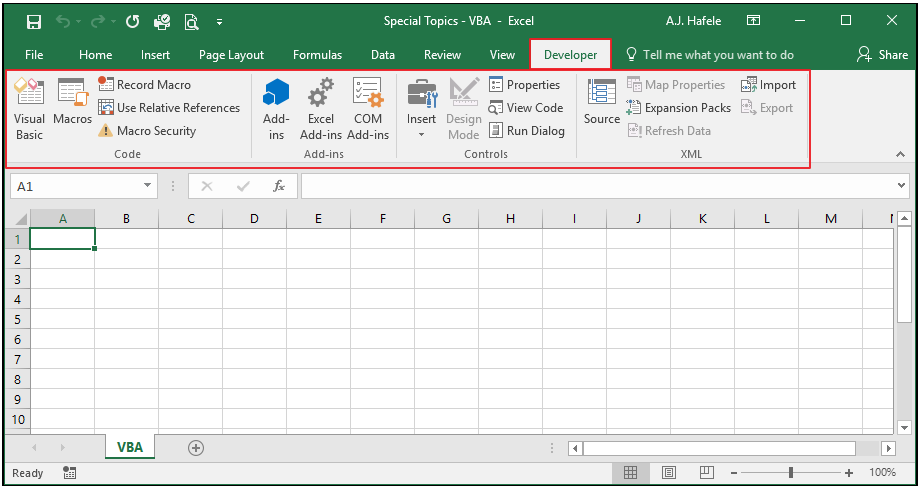
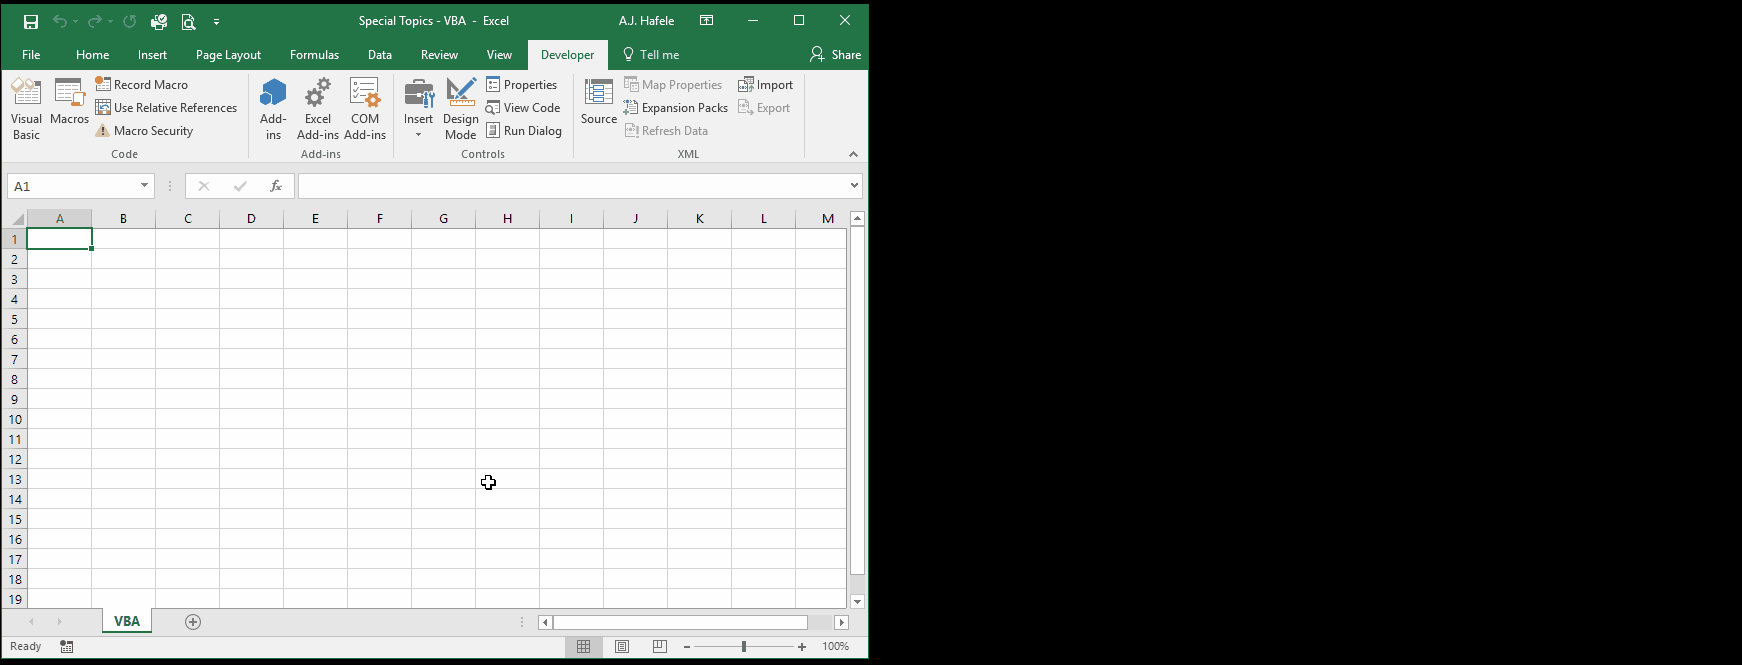
Where to Enter VBA?
First off, note that the Developer tab is dedicated to VBA-related tasks:
If you do not see the Developer tab, add it via Excel Options as shown here:
As you can see, the Developer tab has a lot of options that do many different things (beyond our scope)
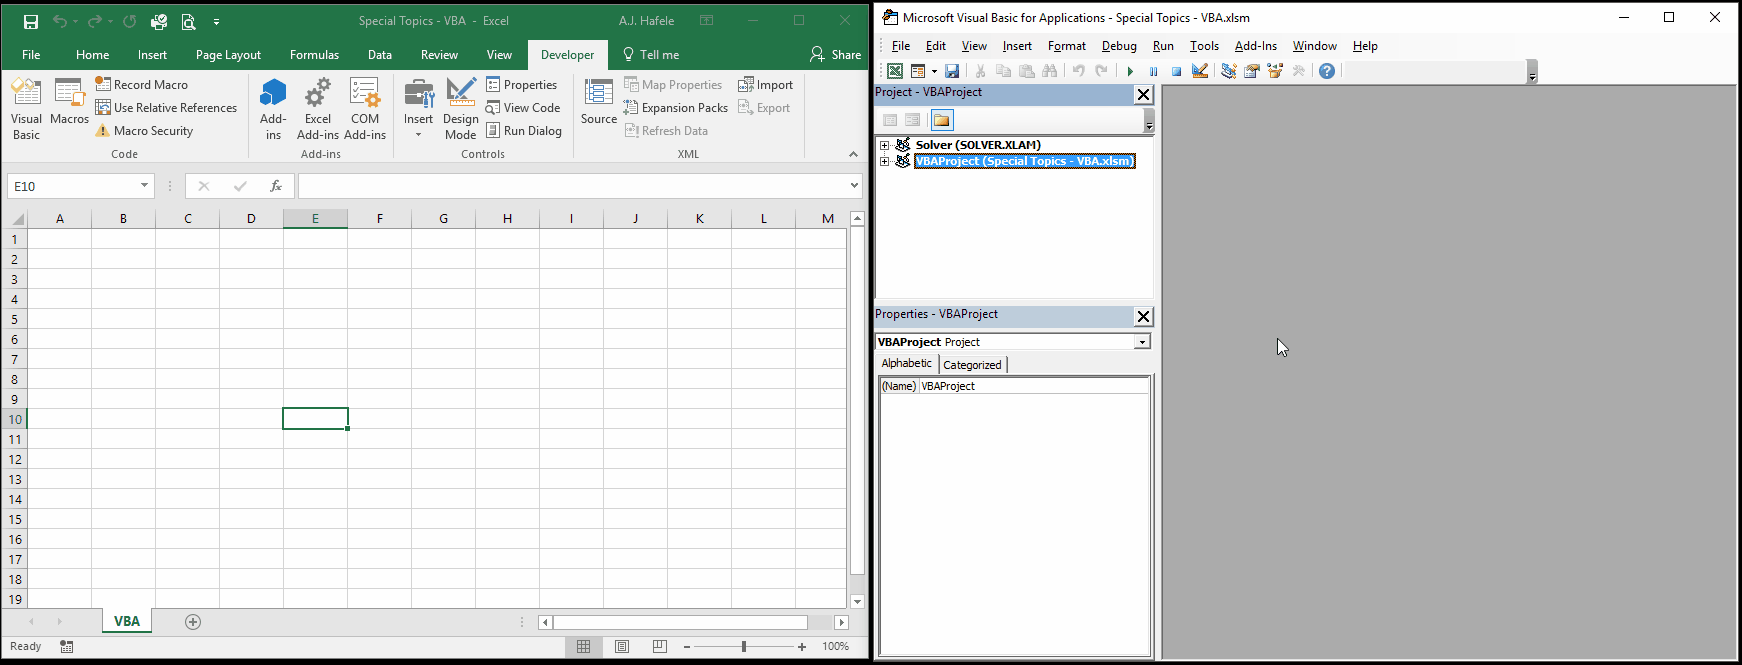
You do not enter VBA code within Excel itself. Rather, you write it in the VBE (Visual Basic Editor) window. To get there, simply click the Visual Basic button as shown here:
Once again, there is an entire window with buttons and menus that may be foreign to you (also beyond our scope)
We will only focus on where you place your VBA code, which is inside a module, as shown here:
Notice that after we insert a new module (Module1), it is added under the VBA project for the Excel workbook currently open (Special Topics - VBA.xlsm)
How to Enter VBA?
There are 2 major ways to enter VBA code
By typing it (or copying and pasting it) into a VBA module
By using the macro recorder
The macro recorder essentially translates your actions in Excel into VBA code and places it in a module
The macro recorder can only be used for Sub procedures
We will use the macro recorder in the Sub Procedures section below
Function Procedures
As the name indicates, function procedures are used to create custom functions
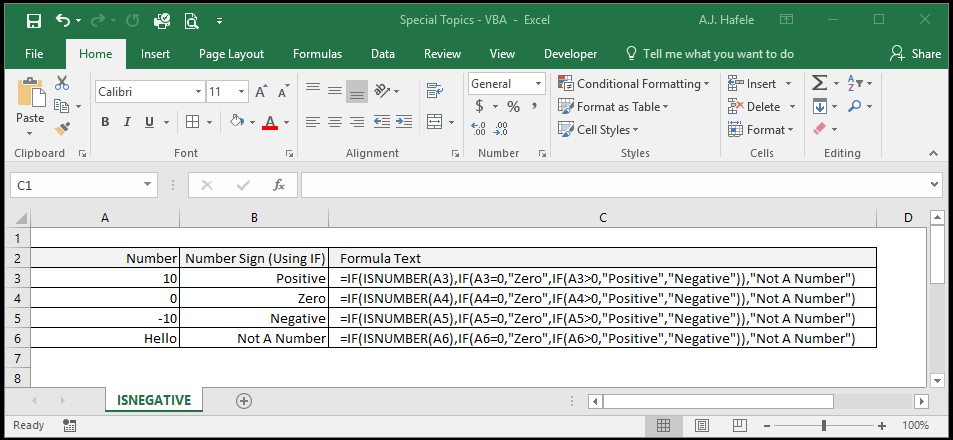
Imagine we need Excel to tells us if a number is negative, positive, or zero (or not a number):
We can use a formula with nested IF functions, as shown here:
But what if we wanted a function that was more simple and elegant than the huge formula above?
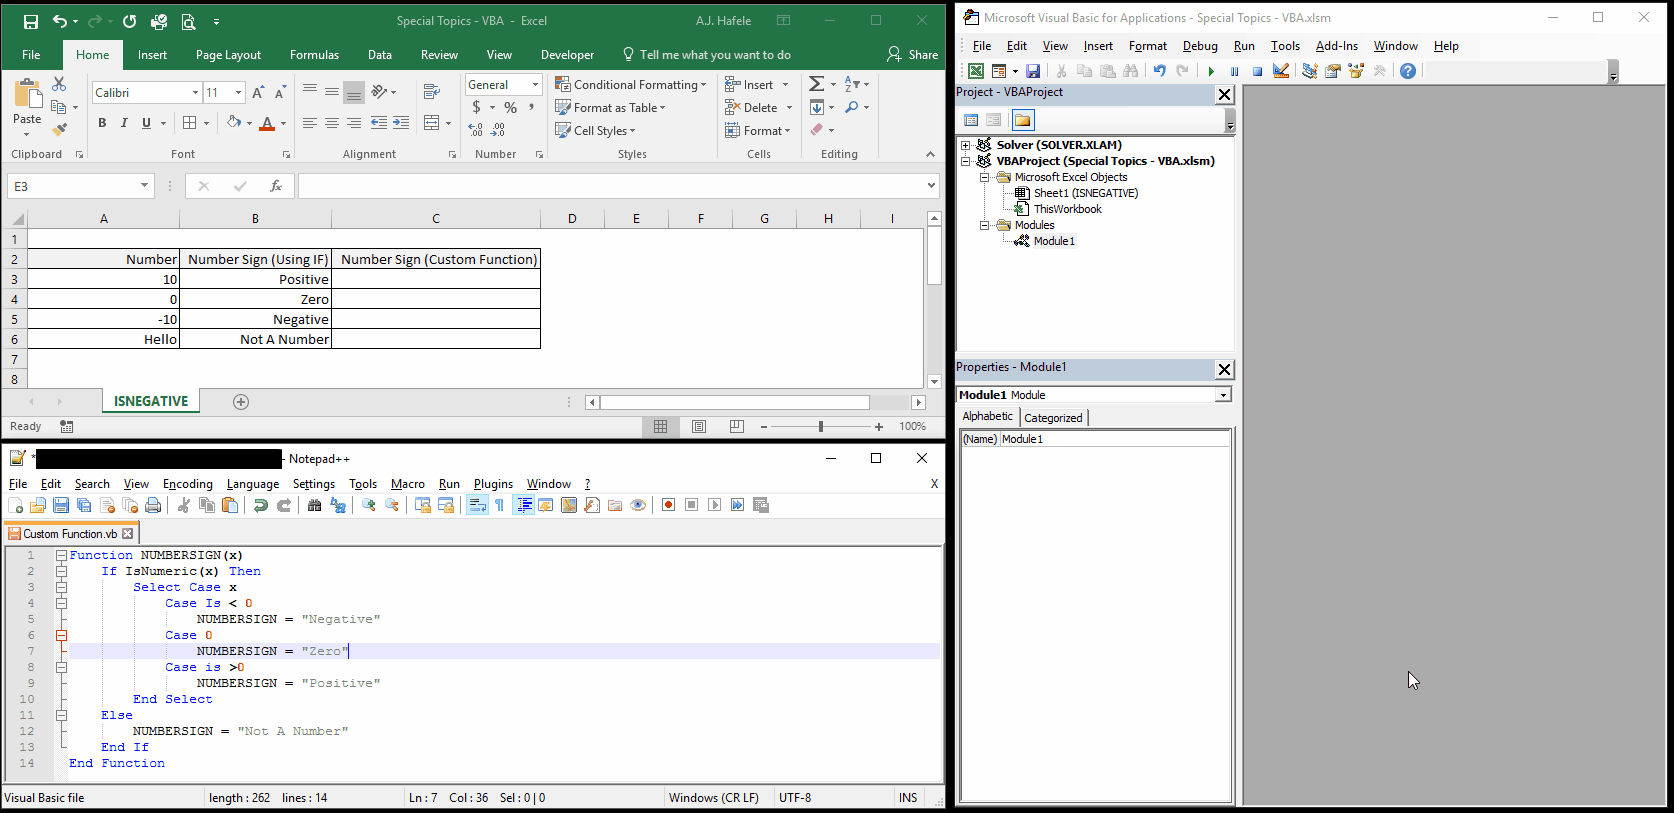
Let's create a custom function called NUMBERSIGN that will do the exact same thing
Rather than type the code, we will copy and paste it from Notepad into Module1 (created above):
Note that the programming language syntax is beyond the scope of this lecture, but because understanding the syntax itself is required in order to create macros, we highly recommend utilizing the resources in the External Links section below
While this custom formula was not extremely complicated (or very useful), it does illustrate how custom functions can be created to simplify your work
Sub Procedures
Think of Sub procedures generically as a series of automated actions that are performed (and they are not functions!)
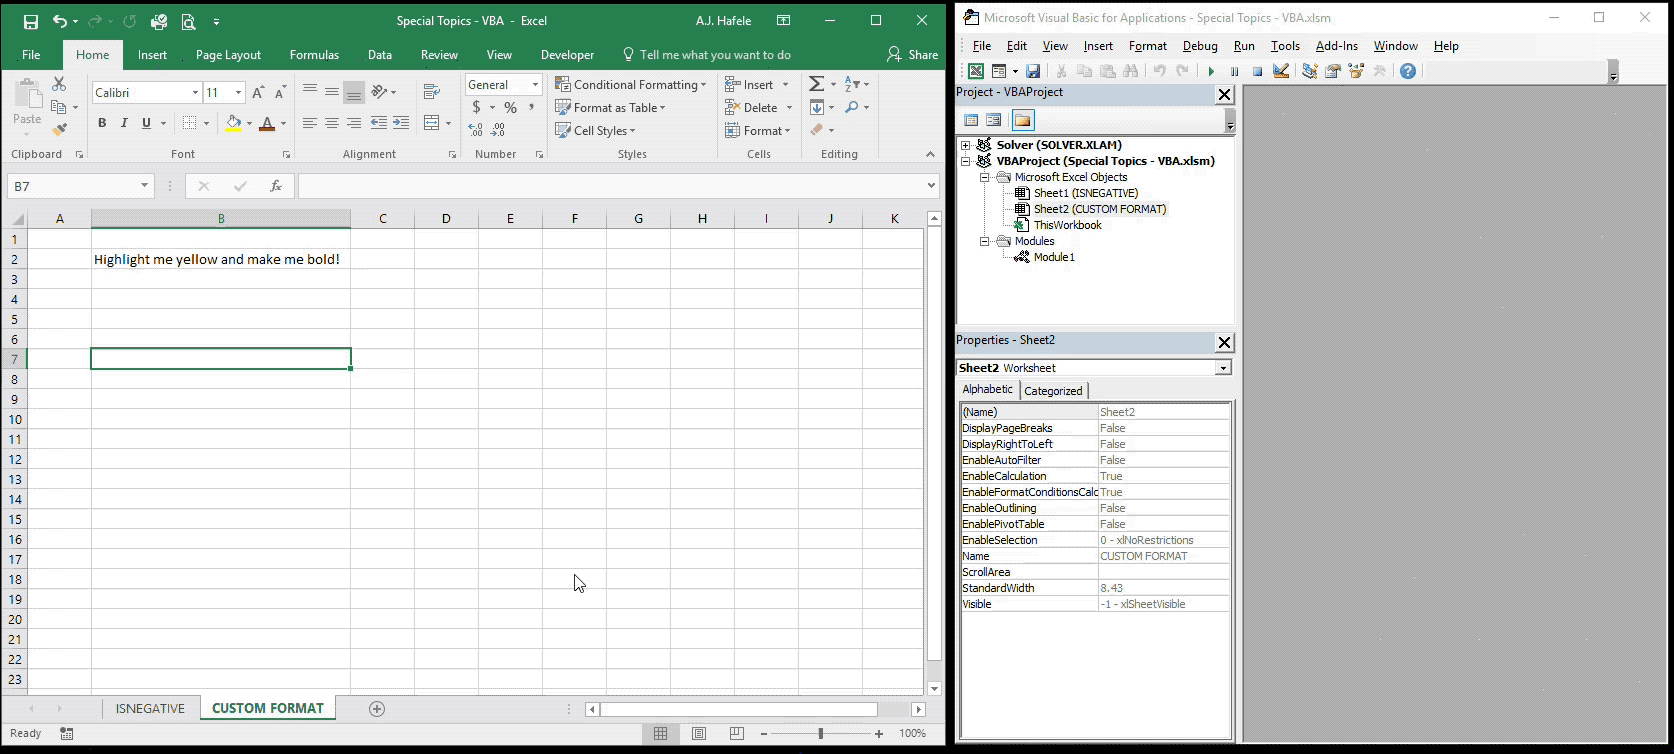
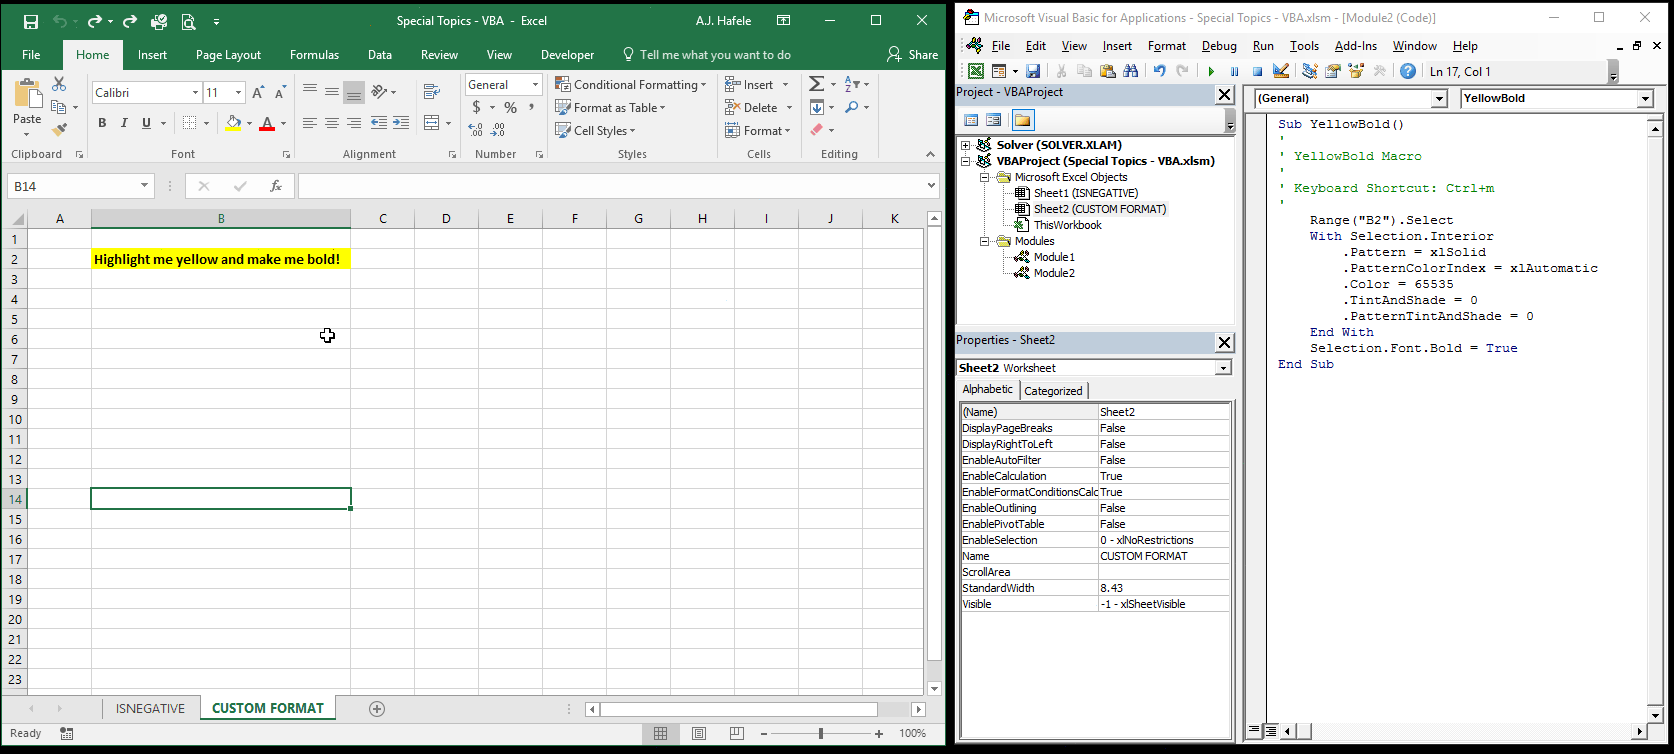
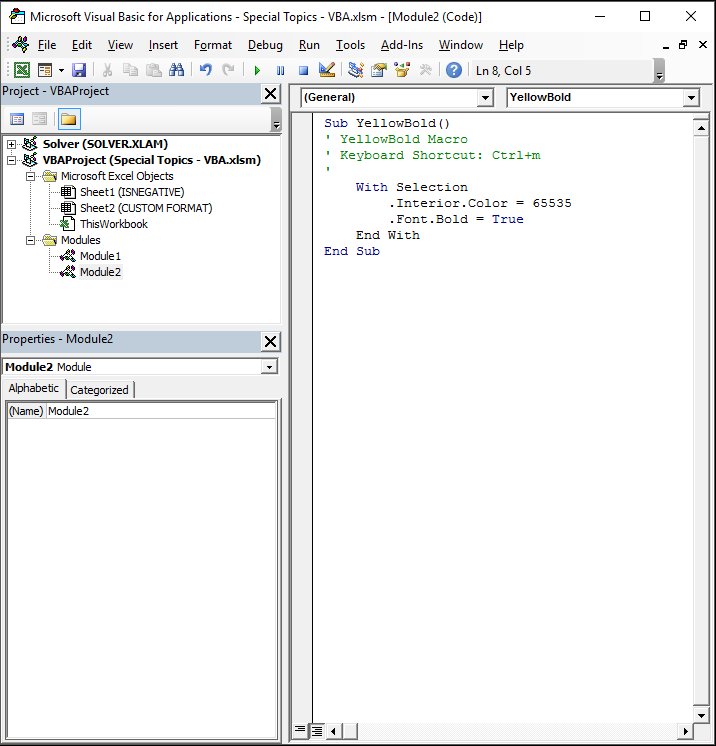
To illustrate, imagine that you want to create a macro which highlights cell B2 yellow and makes its font bold
Observe as we create this macro via Macro Recorder (you can actually see the code being created in real time!):
Note that the small button clicked at the very bottom of the Excel window starts and stops the macro recorder (it does the same thing as the Macro Recorder button in the Developer tab)
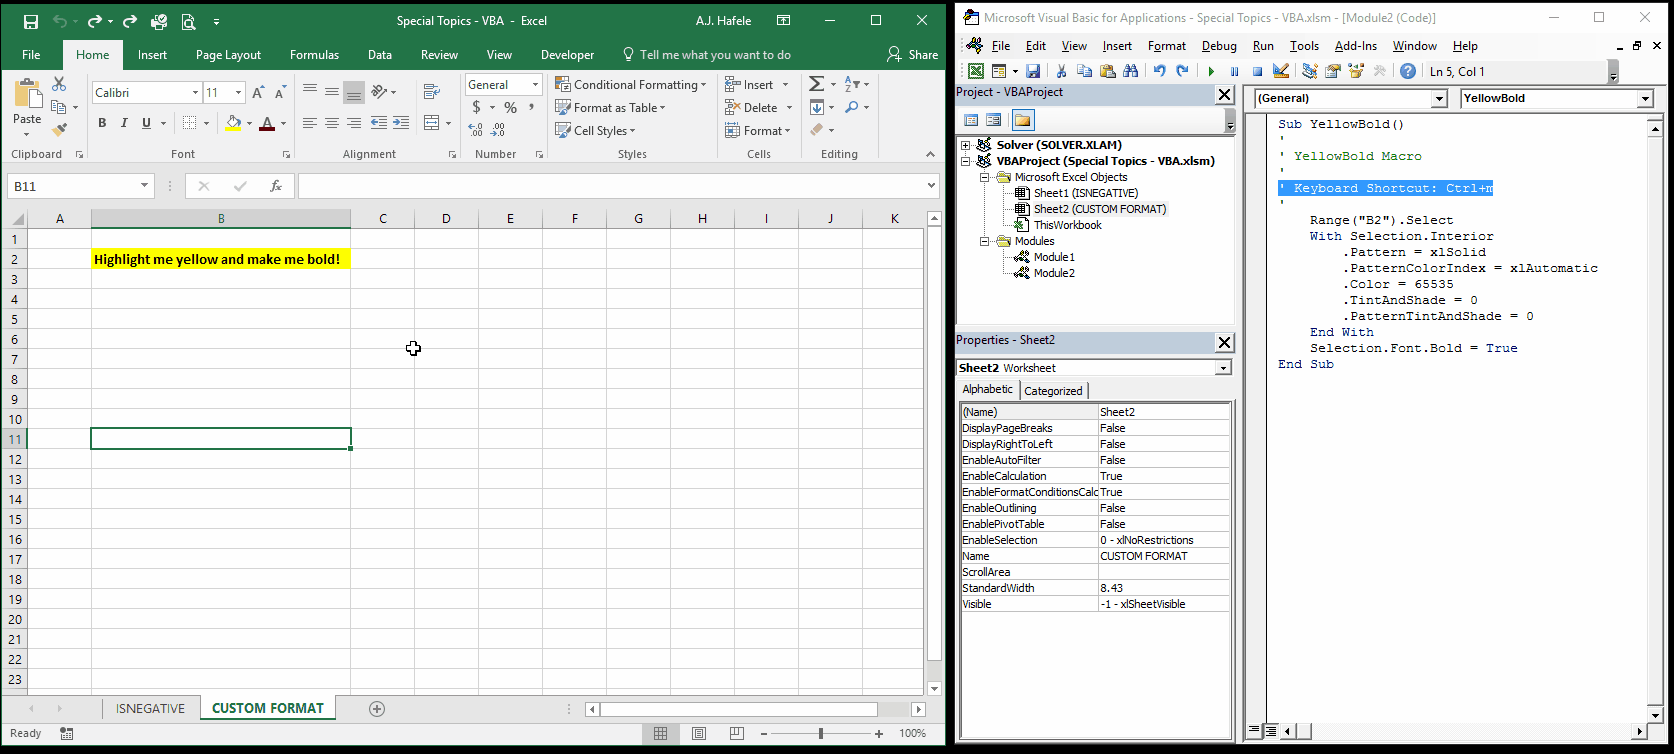
If you noticed carefully, when creating this macro, we assigned a shortcut to it - the "m" key, corresponding to CTRL+M
Note that if we would have assigned a capital "M" as the shortcut key, the shortcut would have been CTRL+SHIFT+M instead
Warning! We strongly discourage assigning macros characters corresponding to commonly-used shortcuts, such as CTRL+C (copy), CTRL+A (select all), CTRL+P (print), etc
Let's clear the formatting in B2 and run the macro to see what happens:
Observe as we clear out the formatting and press CTRL+M to re-format cell B2:
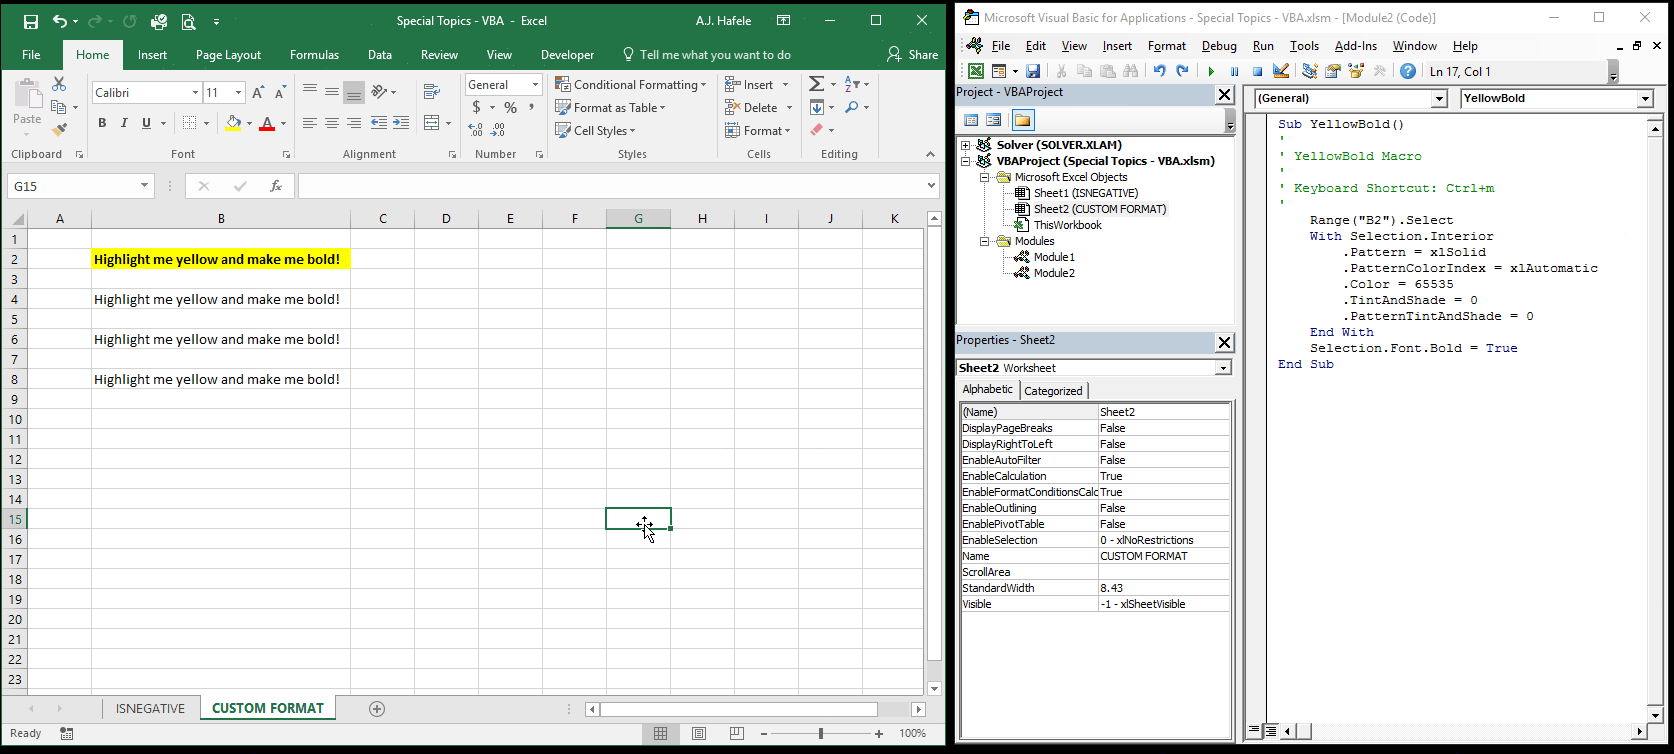
But what if we wanted to highlight and bold the selected cells, not just B2, as is shown above? We need to tweak the code to reference the selected range rather than B2
In this case, it is as simple as removing one line from the code that references B2:
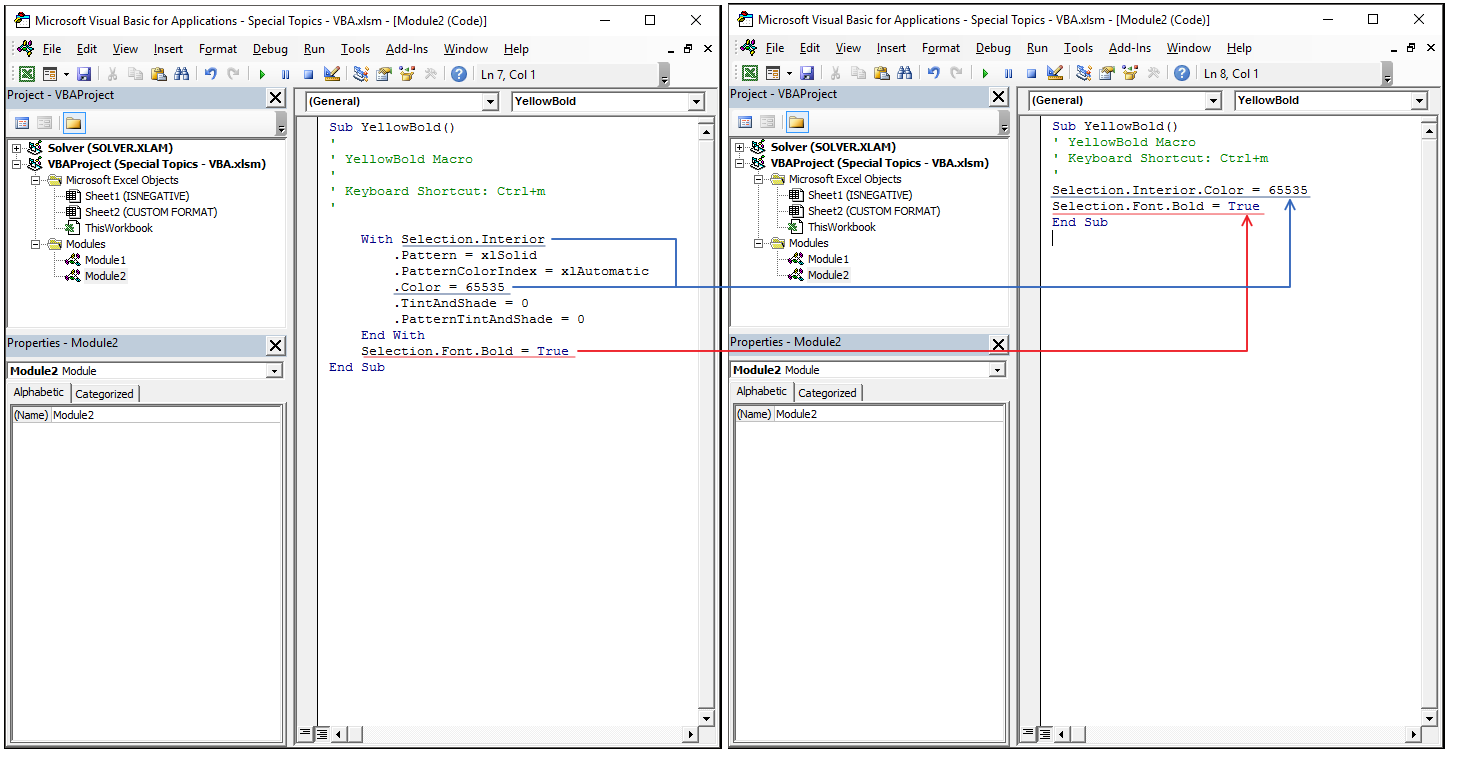
Importantly, although Macro Recorder is convenient to use, it typically does not generate the most efficient code
Let's modify the code a bit more to make it more concise:
What did we do? We:
Removed all the unnecessary code (from the left side), such as the pattern specification
Removed the With...End With statement
Alternatively, we could have written the code with a With...End With statement, as follows:
All three versions of the code do the exact same thing, but the latter 2 are written more efficiently
For such a small macro, the difference will not be noticeable, so efficiency is more relevant with respect to longer and more complex macros
In the example above, we used macro recorder to create our VBA
More specifically, the Macro Recorder used absolute cell references when we initially created the code
Of course, we subsequently modified it to make it flexible to highlight and bold all selected cells
It is worth pointing out that you can set Macro Recorder to use relative cell references while recording macros
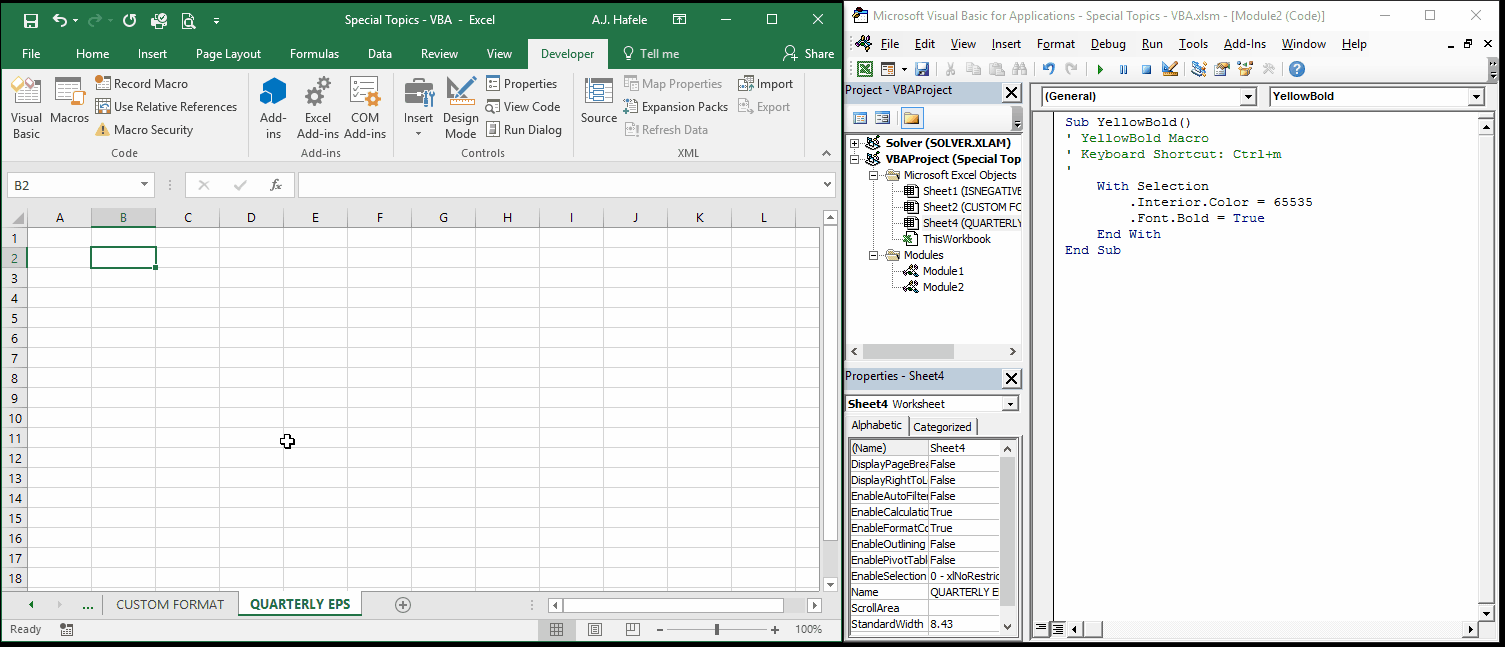
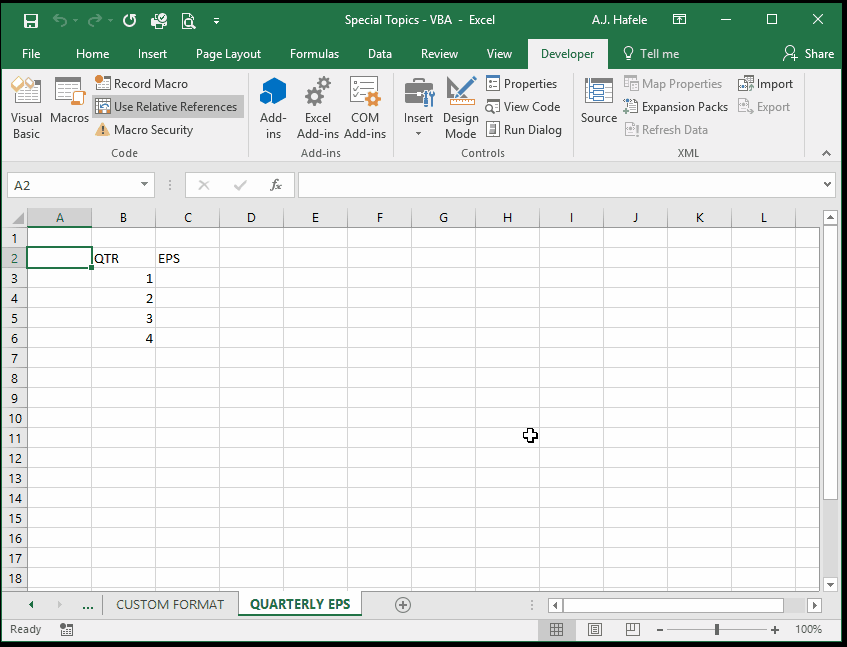
For example, imagine we need to create a simple, unformatted table as a shell for entering quarterly EPS figures
Let's use Macro Recorder to record the code needed to create this table from wherever the active cell is (by using relative cell references):
Notice that:
The shortcut to execute this macro is CTRL+W
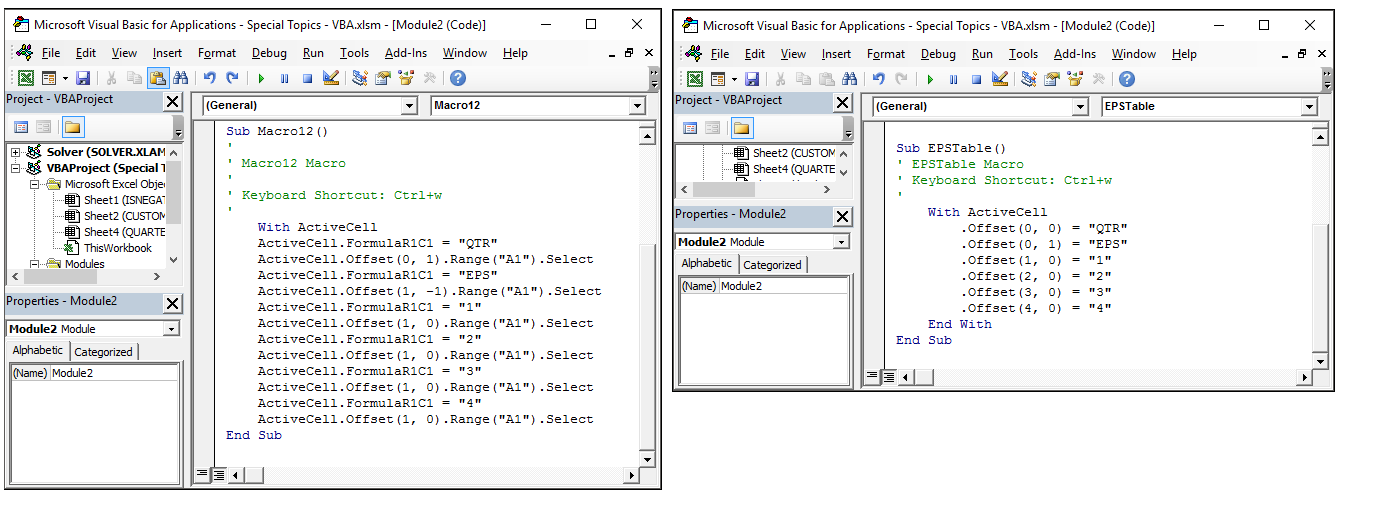
The code was compiled within Module2 (in the VBE window) right below our YellowBold macro, and that is perfectly fine
The VBA code utilizes "Offset" when compiling the code, which works exactly like the OFFSET function within Excel to maintain flexibility
Ignore the reference to A1 - it's just necessary product of how Macro Recorder works
Now, let's delete our initial data, move the active cell, and then use the macro (via CTRL+W) to create the table again:
Notice that each time we press CTRL+W, the table is created in the range corresponding to where the active cell is!
As usual, the code is big, ugly and inefficient, so we have cleaned it up to appear as follows:
We also gave the macro a more relevant name (EPSTable, rather than Macro12)
Again, both macros will do the exact same thing, except the updated version (on the right) is more efficient
Also, this may seem trivial for such a small table, but imagine needing to frequently create a very large table, perhaps with formatting and computations added
Last, one word of caution on using sub procedures: after a sub procedure is executed, you cannot undo any previous actions, including undoing the sub procedure itself! As such, you may want save your file before running a sub procedure if you are not sure that you want to keep the end result
When To Use VBA?
VBA can be extremely useful, but you should know when to use it, and when to avoid using it
As basic as it sounds, you should use VBA only when you have to use it
In particular, it is extremely useful when you have to perform long and repetitive tasks (or frequently use complicated formulas) that cannot be made any more efficient through non-VBA methodologies
It is better to design a workbook optimally without using VBA than it is to design a sub-optimal workbook and then compensate for its inefficiencies by using VBA
The result may be that the file is much more complicated and error-prone than it otherwise could be
Last, consider optimizing your entire workflow before opting to use VBA
For example, perhaps you are getting a third-party Excel report that is in a stylized format, but you really need it in a tabular format so you can analyze it with a PivotTable
You can use VBA to automate the reformatting of the report, but perhaps your third party can simply give you the data in an non-stylized, tabular format (so be sure to ask before resorting to VBA!)
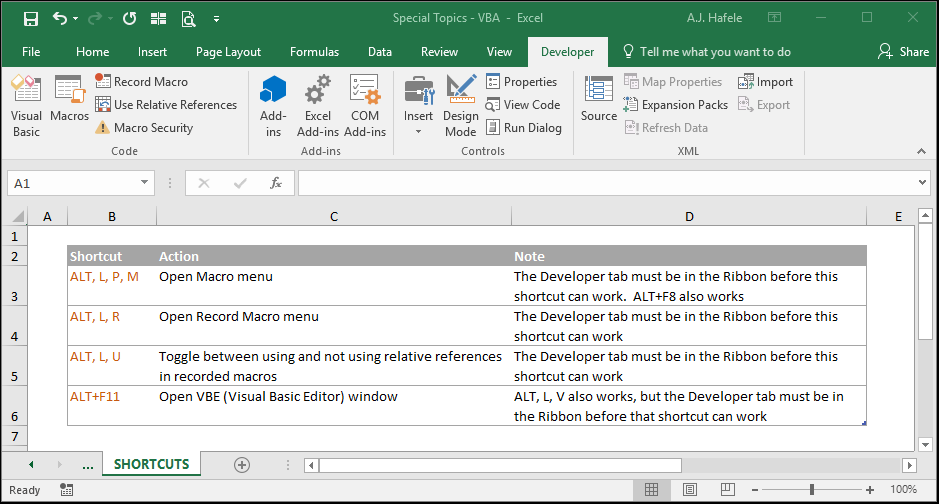
Shortcuts
Additionally, remember that you can create your own shortcuts to execute macros