Inserting and deleting rows, columns and cells is essential to editing worksheets
We will present a variety of methods to perform these tasks, including using the Ribbon, right-clicking with your mouse, and of course, using keyboard shortcuts
Be sure to experiment with these different methods to see which is best for you
Buttons
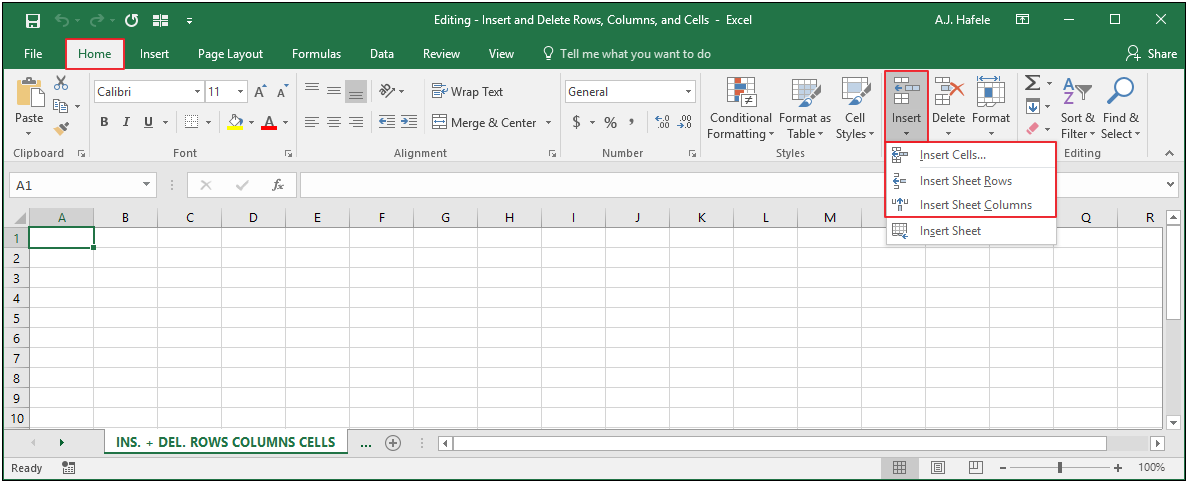
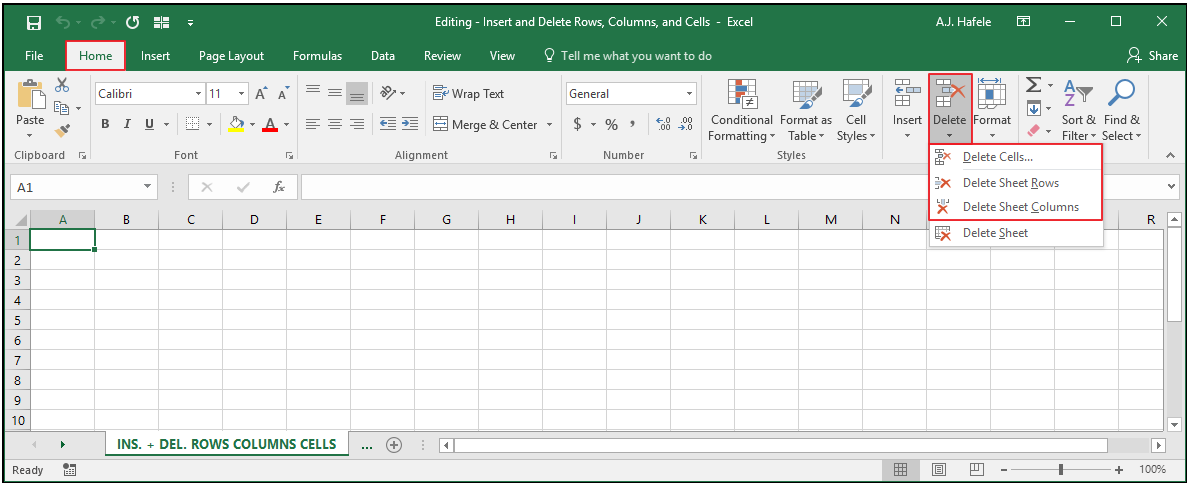
The relevant buttons can be found in the Cells group of the Home tab
The buttons used to insert rows, columns and cells are found here:
The buttons used to delete rows, columns and cells are found here:
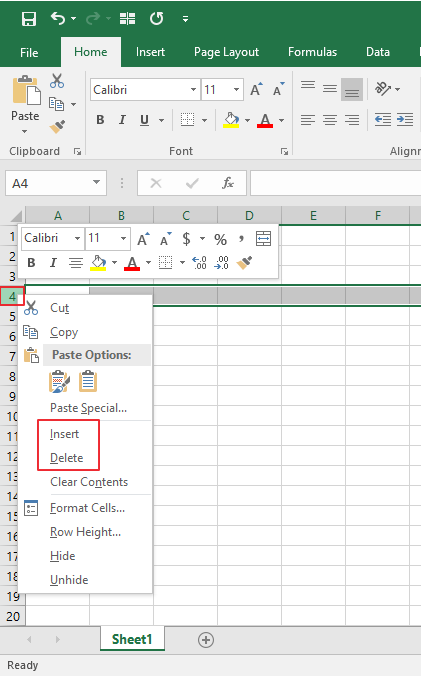
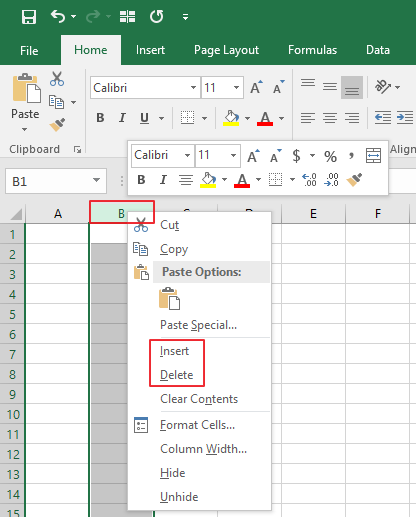
Additionally, you can insert or delete rows, columns, or cells by right-clicking row numbers, column letters, or cells, and selecting the Insert or Delete buttons, as shown here:
We will show you how to use these buttons in the discussions below
Some Definitions
Before we continue, let's briefly outline what we mean by "inserting and deleting rows, columns, and cells"
"Inserting rows or columns" refers to creating new blank rows or columns of cells
"Deleting rows or columns" refers to deleting existing rows or columns of cells
"Inserting and deleting cells" refers to adding or removing a specified set of cells (not entire rows or columns)
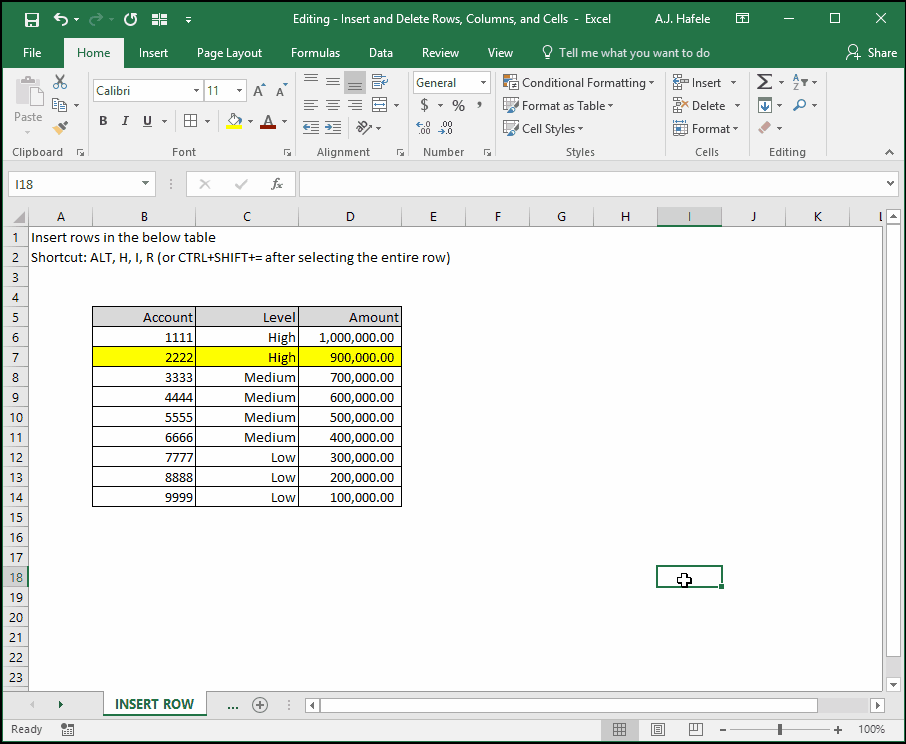
Insert Entire Rows
Observe as we insert new rows via:
The Ribbon
Right-clicking a row number
The ALT, H, I, R shortcut, and
The CTRL+SHIFT+= shortcut
Notice that:
When inserting a new row, the formatting from the row directly above is copied down (e.g. the highlight in row 7 above is copied to inserted rows below)
The ALT, H, I, R shortcut does not require you to select the entire row before inserting a new one, as opposed to the CTRL+SHIFT+= shortcut
If you need to repeat the process of inserting new rows, remember that you can use the F4 shortcut to repeat previous action! (see the lecture here)
Moreover, the F4 shortcut can work with all actions in this lecture
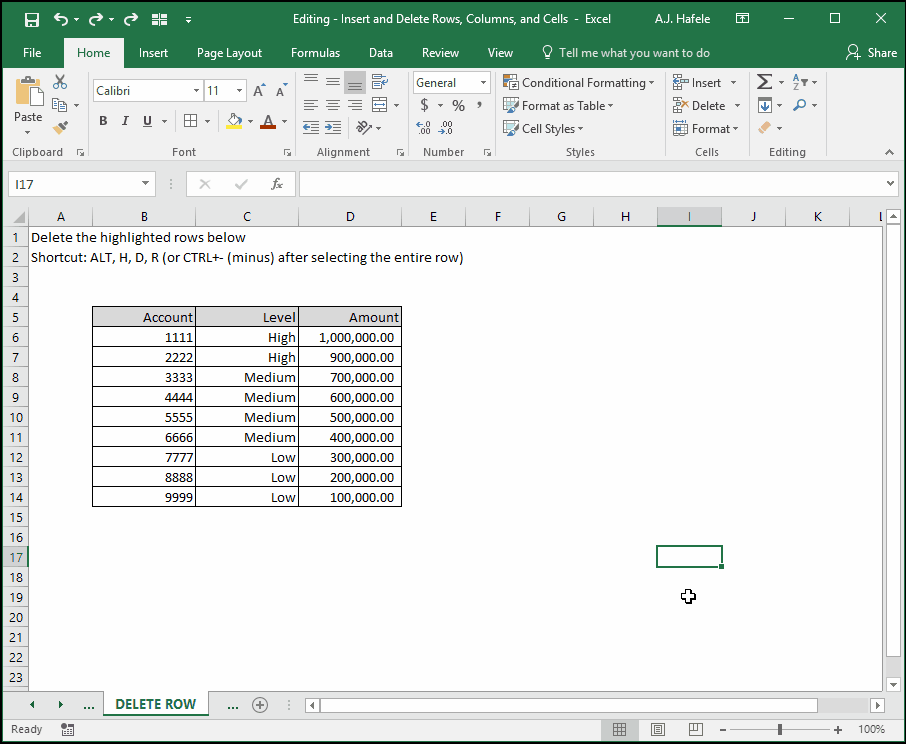
Delete Entire Rows
Observe as we delete rows via:
The Ribbon
Right-clicking a row number
The ALT, H, D, R shortcut, and
The CTRL+- (minus) shortcut
Notice that:
Deleting rows will shift the below rows upward
The ALT, H, D, R shortcut does not require you to select the entire row before inserting a new one, as opposed to the CTRL+- (minus) shortcut
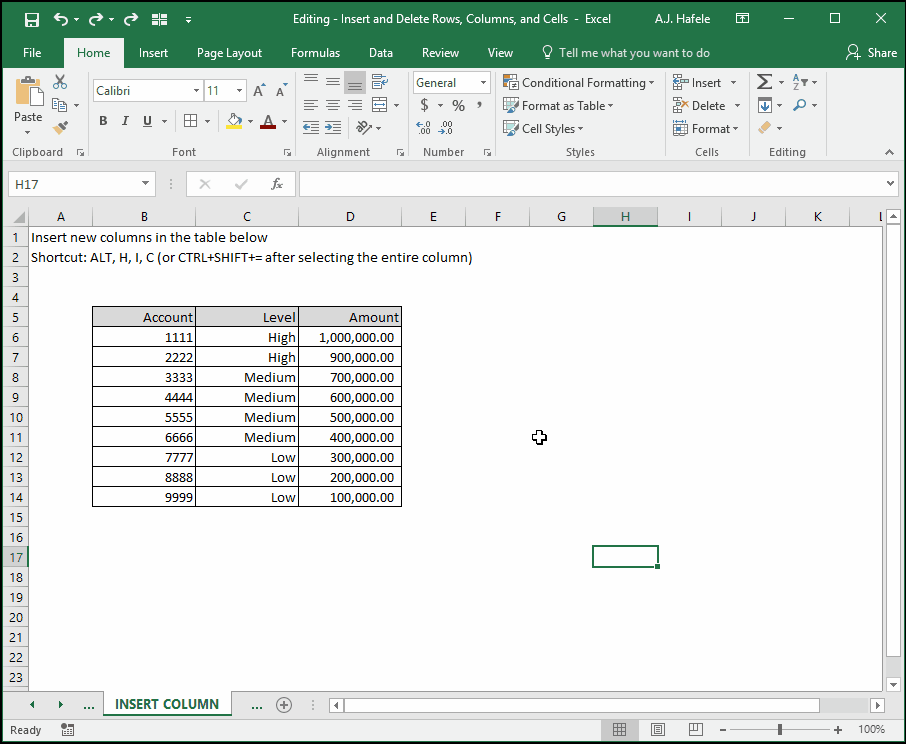
Insert Entire Columns
Observe as we insert new columns via:
The Ribbon
Right-clicking a column letter
The ALT, H, I, C shortcut, and
The CTRL+SHIFT+= shortcut
Notice that:
The Insert button pressed in the Ribbon can also be used to insert new columns, as it did with new rows (you just need to select a column of cells)
When inserting a new column, the formatting from the column directly to the left is copied to the newly-inserted column
The ALT, H, I, C shortcut does not require you to select the entire column before inserting a new one, as opposed to the CTRL+SHIFT+= shortcut
Delete Entire Columns
Observe as we delete columns via:
The Ribbon
Right-clicking a column letter
The ALT, H, D, C shortcut, and
The CTRL+- (minus) shortcut
Notice that:
Deleting columns will shift the columns from right to left
The ALT, H, D, C shortcut does not require you to select the entire column before deleting it, as opposed to the CTRL+- (minus) shortcut
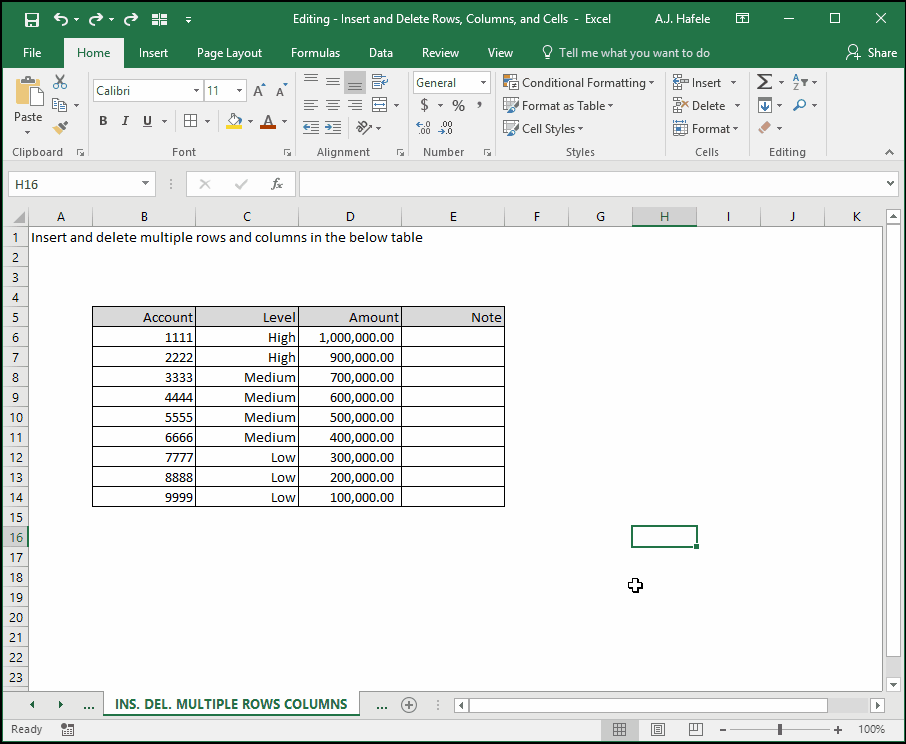
Insert and Delete Multiple Rows and Columns Simultaneously
Though not shown above, you can insert and delete multiple rows and columns simultaneously by selecting all applicable rows or columns and then performing the same exact actions
Observe as we insert and delete multiple cells simultaneously in the following illustration:
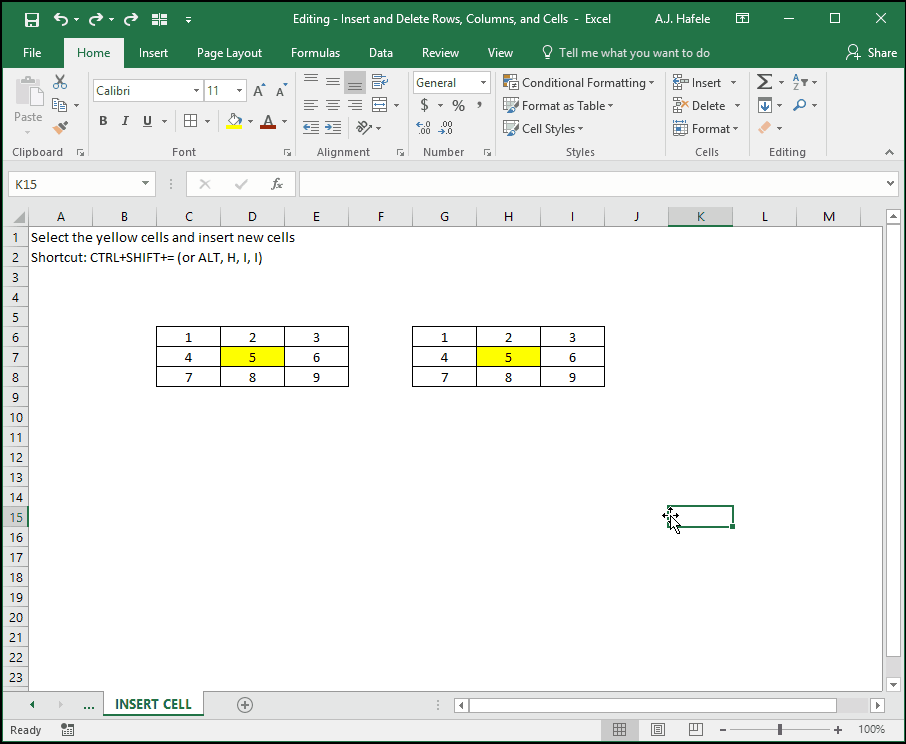
Insert Individual Cells
Instead of inserting entire rows or columns, you have the ability to insert individual blank cells, as shown here (we use ALT, H, I, I on the second insertion):
Notice that:
You can choose to shift cells down or right when inserting new cells
The Insert button will automatically insert cells by shifting down existing cells
Though not shown, you can insert multiple cells by selecting all applicable ranges (which can be non-contiguous) and then inserting in the same manner as shown above
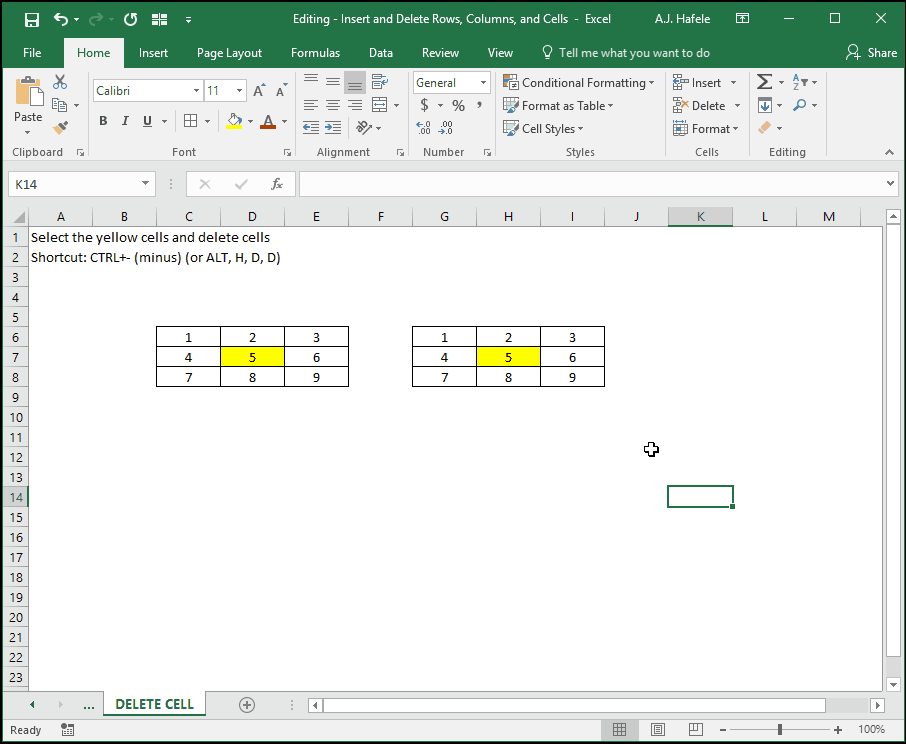
Delete Individual Cells
Instead of deleting entire rows or columns, you have the ability to delete individual cells, as shown here (we use CTRL+- (minus) on the second deletion):
Notice that you can choose to shift cells up or left when deleting cells
Though not shown:
The Delete button in the Ribbon will automatically shift the below cells upward after cells are deleted
You can delete multiple cells by selecting all applicable ranges (which can be non-contiguous) and then deleting in the same manner as shown above
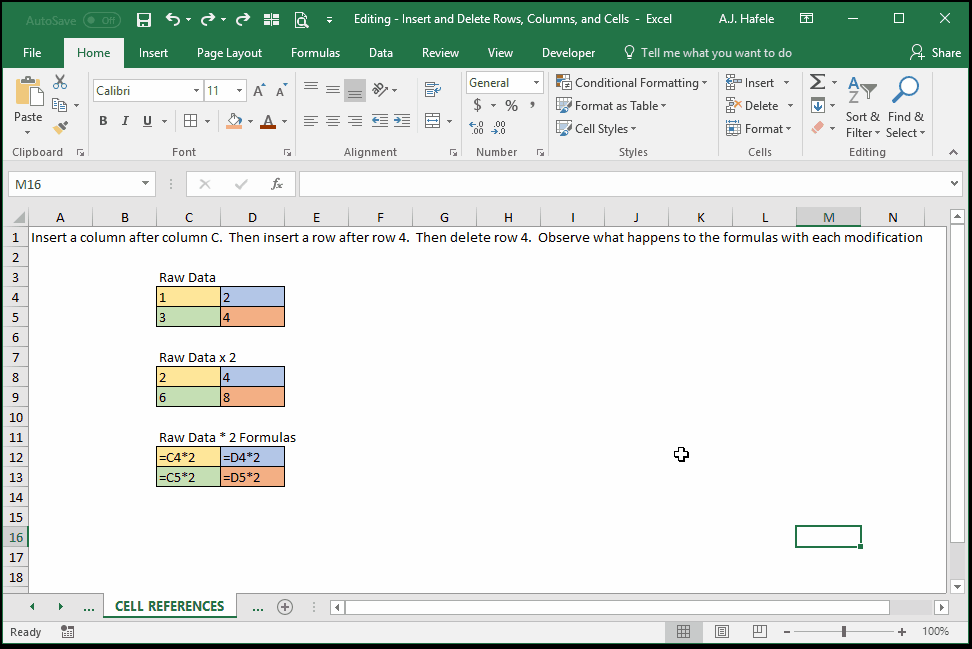
Impact of Insertions and Deletions on Cell References
At this point, we have not went into depth with respect to cell references in formulas
However, be aware that, when new cells are inserted, cell references will dynamically adjust in order to reference the original cells
Additionally, be aware that, when existing cells that are being referenced are deleted, you may end up with #REF! errors
The impact of inserting and deleting cells on cells with references is illustrated here:
Notice that:
When the new column is inserted, the blue and orange cells now reference column E (instead of column D)
When the new row is inserted, the green and orange cells now reference row 6 (instead of row 5)
When row 4 is deleted, the yellow and blue cells end up with #REF! errors (they do not know what to reference anymore!)
Though not shown above, the same occurs when inserting and deleting specific cells (rather than entire rows and columns)
We will discuss cell referencing in more detail in future lectures, but for now, just be aware of what happens to cell references when inserting and deleting cells