Sorting is one of Excel's most essential functionalities
It allows you to sort data from A to Z, largest to smallest, oldest to newest, etc. (and vice versa)
You can also sort multiple fields at once
Sorting can be performed on ranges of cells, or within tables
Buttons
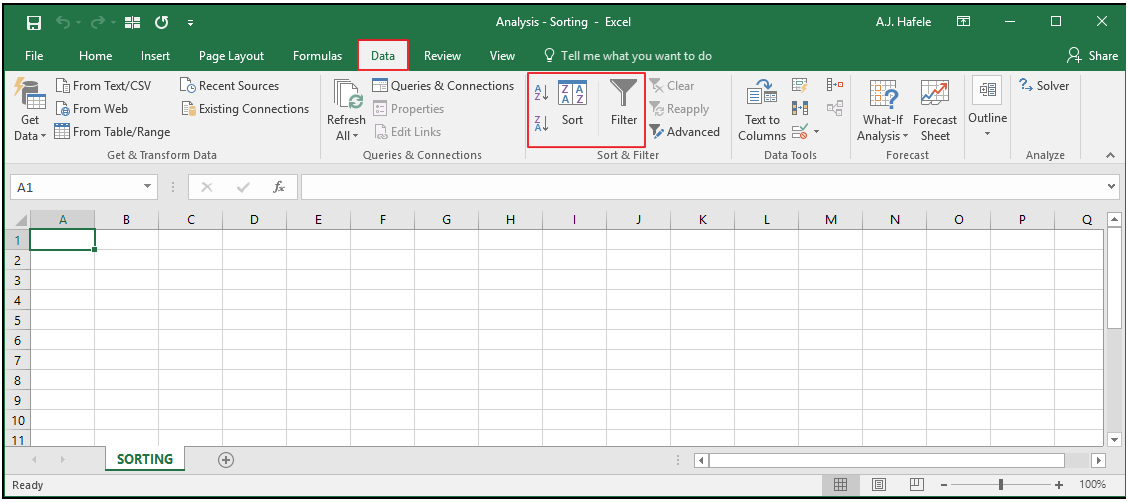
The relevant buttons can be found in the Sort & Filter group of the Data tab:
Note that the Filter button above is relevant for sorting as well as filtering - we will demonstrate below
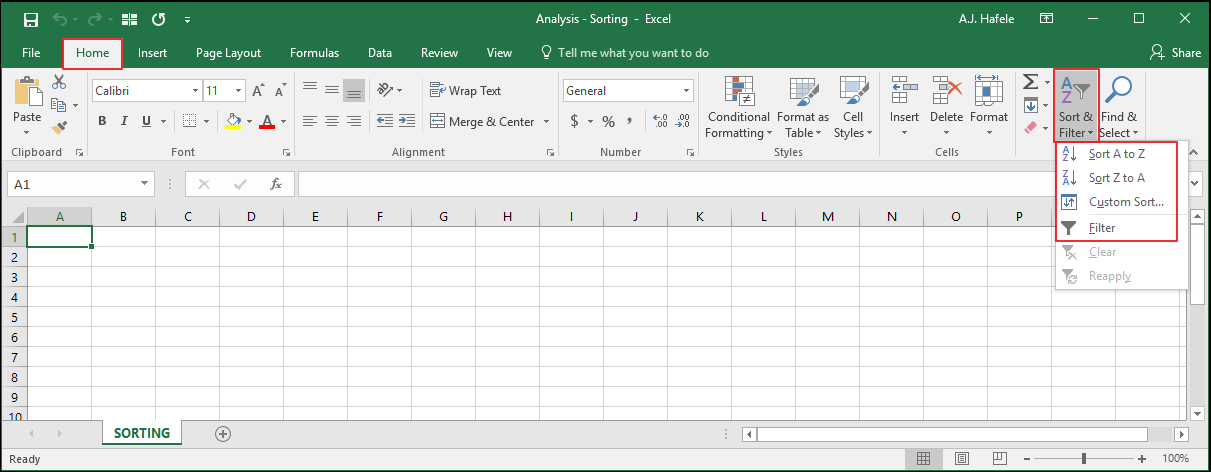
You can also find the same buttons in the Editing group of the Home tab:
Examples
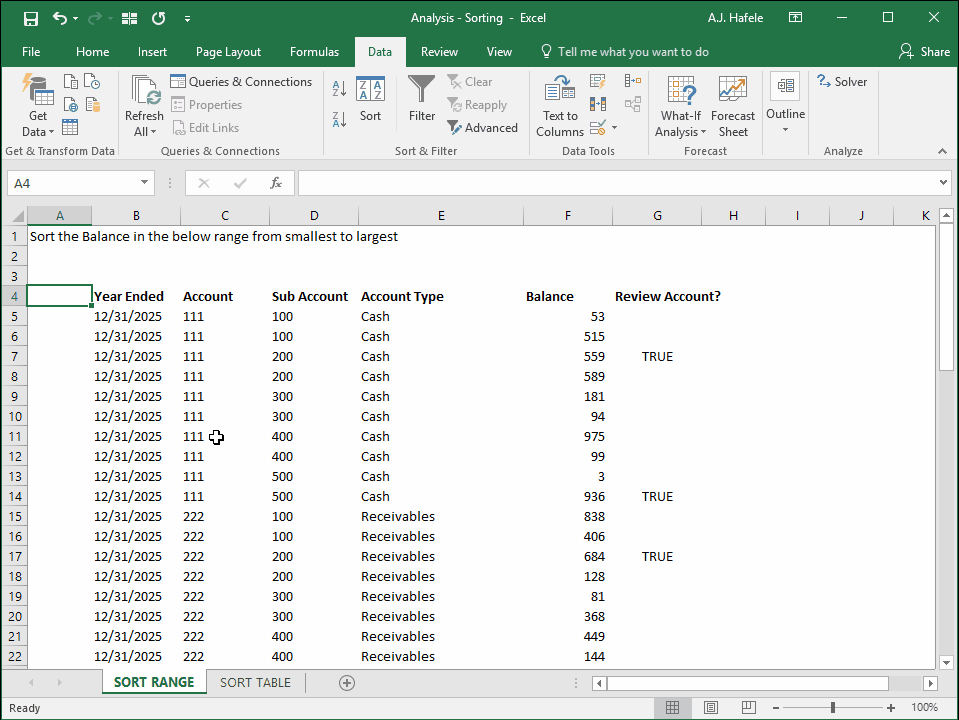
In the first illustration, let's sort a simple range of data (in this case, we sort the Balance from smallest to largest):
You can also use the sort button as shown here to sort the Balance field more quickly:
Notice in both examples that Excel automatically determined the range of cells that was sorted (i.e. the range starting in column B and ending column G)
Although this automatic determination is convenient, we recommend selecting the entire range manually. Why? To ensure the entire range gets sorted
Better yet, if put your data in a table, you won't need to worry about not capturing all the data!
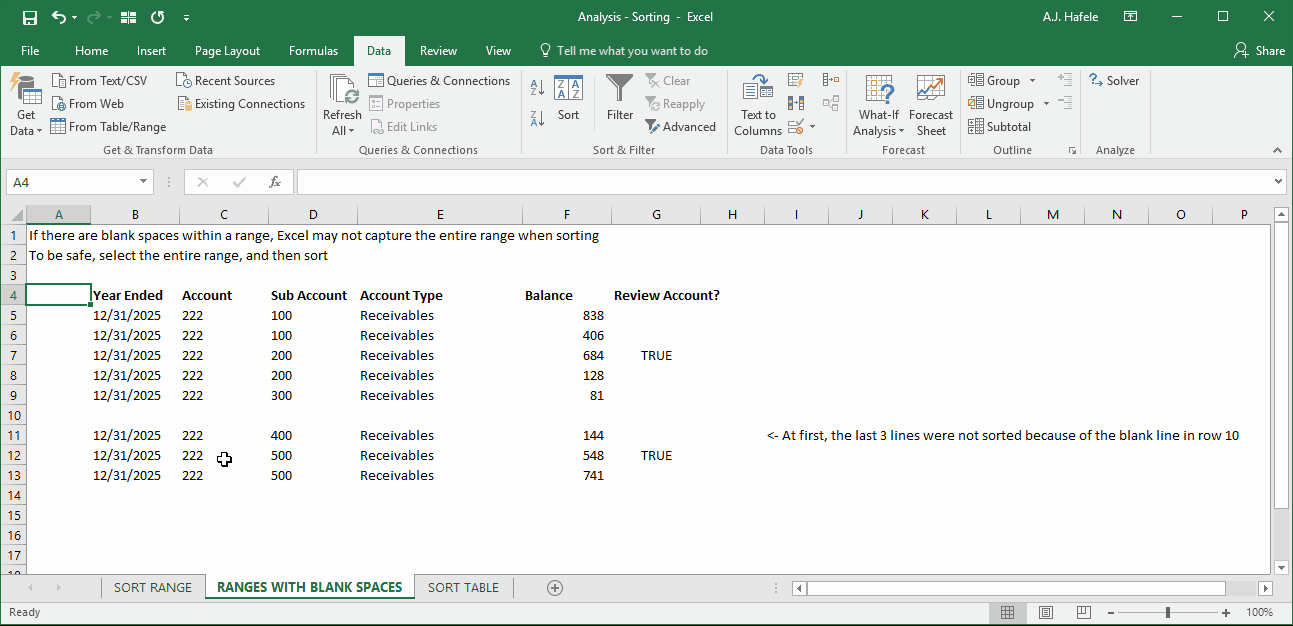
In the next illustration, notice that the bottom 3 rows are missed on the initial sort (but subsequently sorted the second time around, after selecting the entire range):
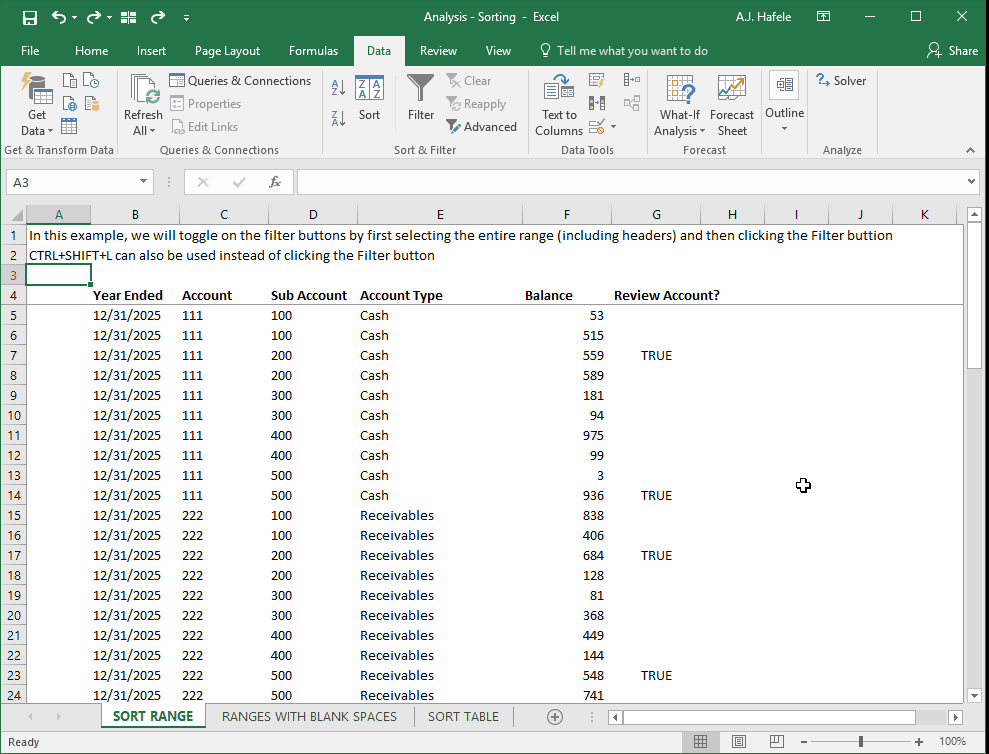
As an alternative to using the sort buttons as shown above, you can also toggle on and use the filter buttons (CTRL+SHIFT+L), which will be displayed on the headers of the data range
In the next example, we will create and use the Filter buttons to sort by Account Type (from Z to A):
Again, however, be careful to ensure that the entire range in question is being sorted when using the CTRL+SHIFT+L shortcut to toggle on the filter buttons
If you data were in a table, however, the filter buttons, once toggled on, will always capture the entire range!
Let's now create a table (which will automatically add Filter buttons) and then sort by Sub Account (note that we change the table design so you can read the headers more easily):
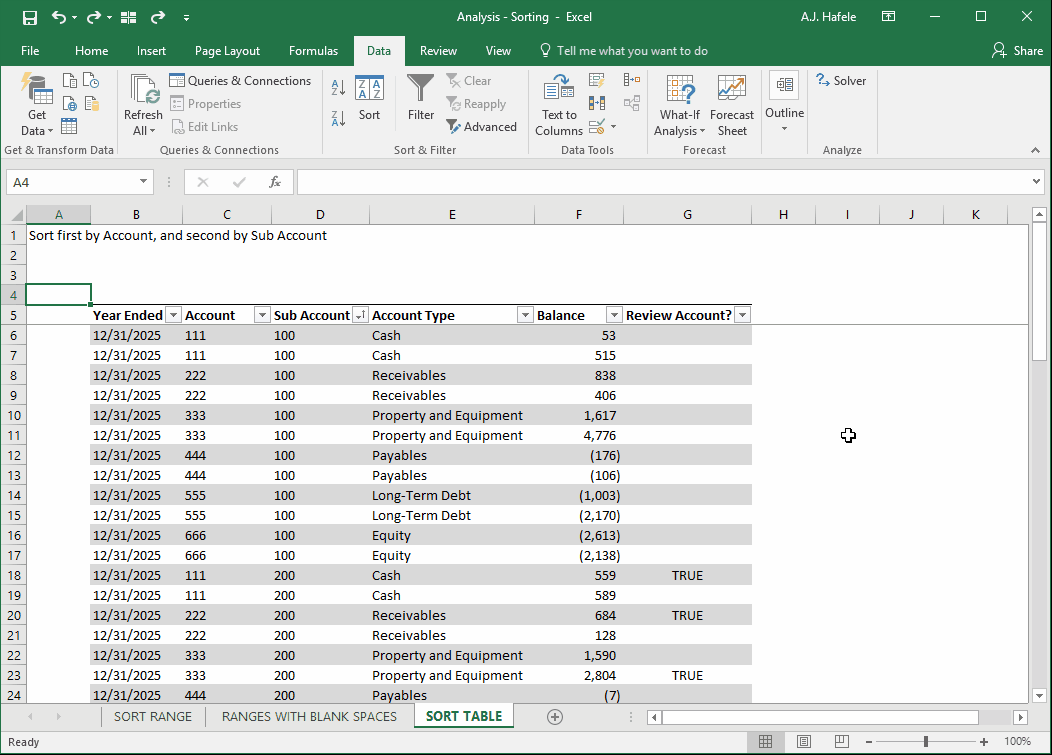
Next, let's sort by multiple criteria - first by Account, and then by Sub Account (you have to use the Sort button to sort multiple fields at once):
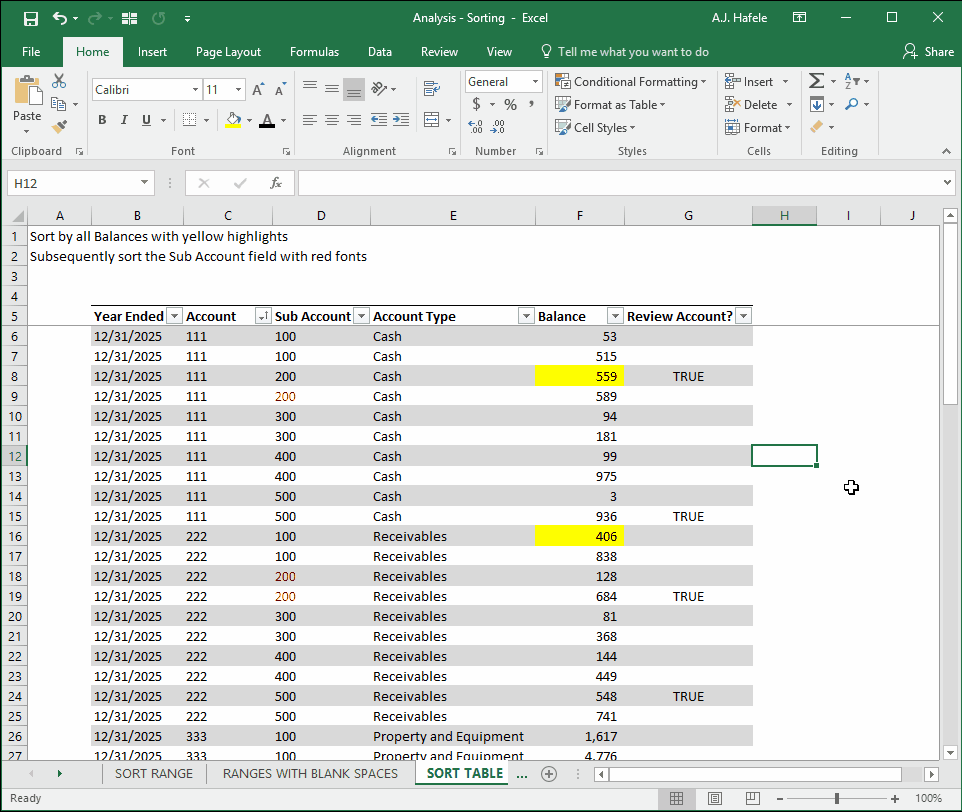
Last, Excel also enables you to sort by color (font and cell color), as shown here:
As simple as it is, sorting by color can come in handy when you are investigating strange items and need to push that data to the top (or bottom) of your table
An even better alternative when dealing with review items, however, is to avoid highlights and simply create a Review field (which is actually what we have done in column G in the above example)